Lightroom vs Darktable: Comparison in 2025
Last Updated on January 16, 2025

Are you a professional photographer or a creative amateur who adores editing images? So, if you want to cut pictures, adjust color, increase/decrease contrast, or do other changes to give your photos more attractiveness, you need a good photo editor. But which option to choose?
After all, it can seem like a puzzle among a lot of programs. Don’t worry! We decided to simplify your task by preparing an article comparing two popular editing software: Lightroom vs Darktable. Information about their feature and key differences will help you to decide on the perfect program for your cases.
Adobe Lightroom: Several Main Words
First, let's talk about each photo editor separately. And let’s start with Adobe Lightroom, which is widely used around the world by creative people.
What is Adobe Lightroom?
Lightroom is a powerful program, created by Adobe, a large American software developer with headquarters in San Jose, California. So, you can see it among Photoshop, Illustrator, and other products in the Adobe Creative Cloud package.
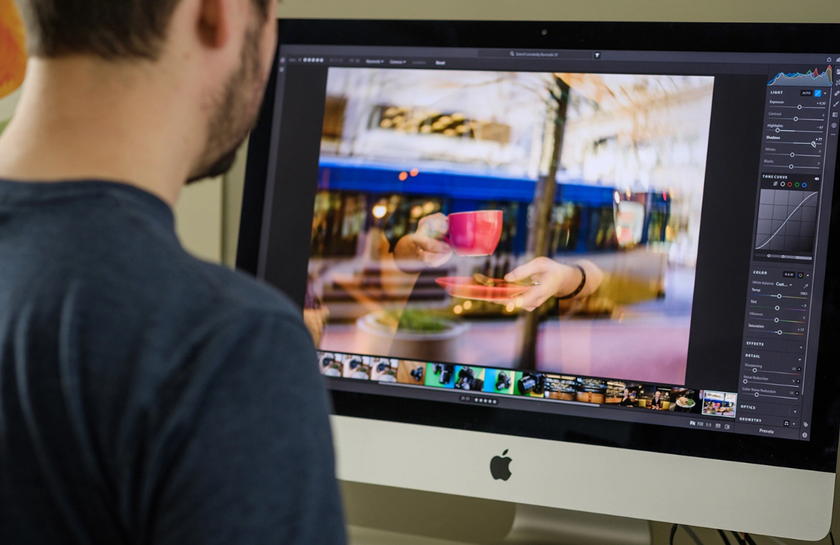
It’s more than just a professional photo editor. The program contains effective tools for processing photos and creating digital content. At the same time, it allows you to organize, convert, store, and share images, moreover on any gadget: laptop, tablet, and smartphone. And it is all because it combines well with Windows, macOS, and iOS.
So, it’s safe to say that this is an ideal workhorse for complex work with multimedia content in the realities of a dynamic life. With this program, you can be mobile, working anywhere: in the office, park, cafe with a cup of aromatic tea, or in a plane while traveling.
What are the Benefits of this Software?
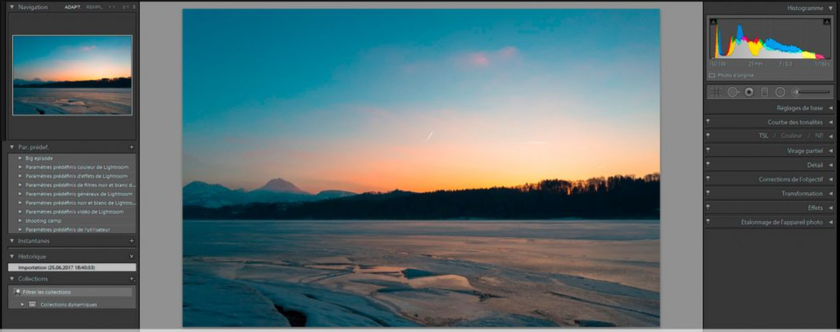
This is a very popular solution among photographers and designers, not by chance. After all, it has convenient sliders and provides wide opportunities for creative work with photo content, without compromising image quality:
- Easy and quality color correction. By adjusting exposure, contrast, white balance, sharpness, and other basic things with the appropriate sliders you like magically breathe life into your photos.
- The ability to apply the HDR effect in the mobile version. Adding more color, detail, and vibrancy to your photos, this effect helps you to convey images of mountains, forests, and canyons, as well as clothing, culinary delight, and other products in the most realistic way possible.
- Allows working with RAW files. This is one of the most common formats that assumes that the images are uncompressed and have high quality.
- Clear and well-organized interface. It is easy to navigate here, even if you’re a beginner. The matter is software has seven modules, including library and editing. They help to organize work with photos in the best way. This will make your workflow faster and more enjoyable.
- Integration with Adobe Photoshop. If you do global retouching in Photoshop, you can easily make small changes in Lightroom by simply importing your work here. Since these two programs are developed by the same company, they interact very well with each other.
- Cataloging of photos. In Lightroom, you’ll not have a problem organizing your data. After all, it has a catalog with advanced metadata settings and the ability to add keywords.
- Adding different Lightroom presets. With just one click you can discover a world of beautiful hues of skin, food, nature, architecture, and much more.
Edit like a Pro with Lightroom Presets
TRY ON MY PHOTOBut this software also has another side of the coin. You can not retouch your photos at a deep level here. This program is capable of only simple image processing. However, if you want to do more complex editing, you can always export your photo content to Photoshop, which is a real guru in such a field.
Also, Lightroom isn’t free pleasure. You have to pay $9.99 per month if you want to use only this program, and $54.99 per month to get access to the entire Adobe Creative Cloud all-app pack. However, you have the opportunity to get acquainted with this software by choosing the 7-day trial version.
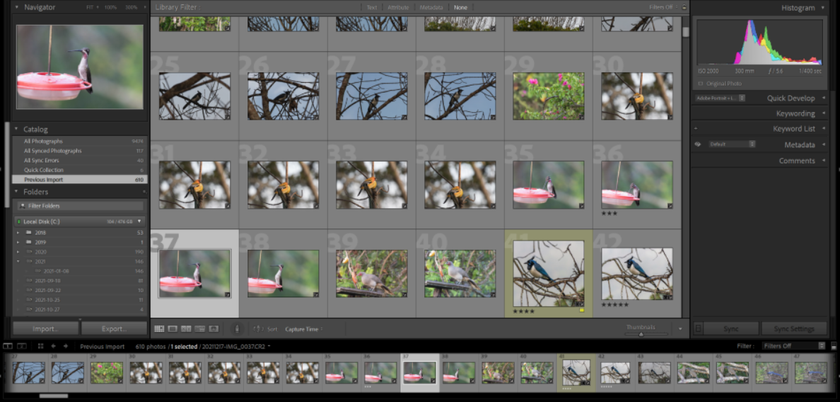
Image Editing is a Main Part of the Lightroom Interface
As we’ve already mentioned, there are 7 modules in the Lightroom interface. They are Develop, Library, Book, Map, Slideshow, Print, and Web. Each of them has its own tools and functions that you can apply to a certain stage of your creative work.
Thus, the Lightroom Library is designed primarily for viewing, sorting, managing, and organizing your photos after you have imported them. Map, as you can see from the name, gives you a unique opportunity to see the place fixed in the photo on a Google map thanks to GPS coordinates. The Book panel is a nice tool that gives aesthetic pleasure because it allows you to create photo books. The Slideshow is a pleasant choice if you enjoy viewing photos as a video clip, that is, with spectacular transitions between them. Do you need to see your images in real life on paper? The Print module is designed for this purpose because here you can set a print command. Before you have the opportunity to adjust the image size, color, or another parameter.
As for the Web module, it’s a find for those who need an interactive photo display for clients, colleagues, or friends. After all, here you can create a website layout. And finally, we have reached the Develop module. Let’s take a closer look at it since this is where the main processing of images often takes place.
Photo editing in this panel is all about making your photos better. Here, you can do the following:
- crop the image;
- remove the red-eye effect;
- adjust saturation and exposure;
- make photos clearer
- set the tone curve;
- reduce noise
- control white balance, highlights, and shadows.
Working in this panel is somewhat similar to Photoshop. But there is one significant difference. It’s the ability to process several hundred or even thousands of photos at once. That is, if you’re a photographer who fixes weddings or portraits, you can immediately take a batch of photos from a particular shoot and apply certain settings to all of them in an instant. It’s impressive, right?
And another advantage of working in this panel is that everything you adjust is non-destructive. This means that you can play around with different versions of your photo without losing the quality and original image data. The processed photo can always be returned to the original version.
What Additional Functions does Lightroom Have?
In addition to basic editing of any image, Lightroom also allows you to retouch a face, that is, remove unnecessary spots on it. If you want to make the photo more complete and harmonious, the presets are also included in the additional functions that will help you to achieve the desired result. You can also overlay a frame, adjust certain areas of the image, apply a graduated filter, add a vintage vignette effect, and even create the photo book in a simplified way.
For Whom This Program will be Useful?
It is a user-friendly software for who work with an entire batch of photos from a certain shoot. In their hands, it turns into a powerful tool that can not only improve images but also create stunning visual content and optimize their creative process perfectly. Also, Lightroom is a nice solution for SMM specialists who often works with the editing of RAW photos.
Darktable: Several Main Words

What is Darktable?
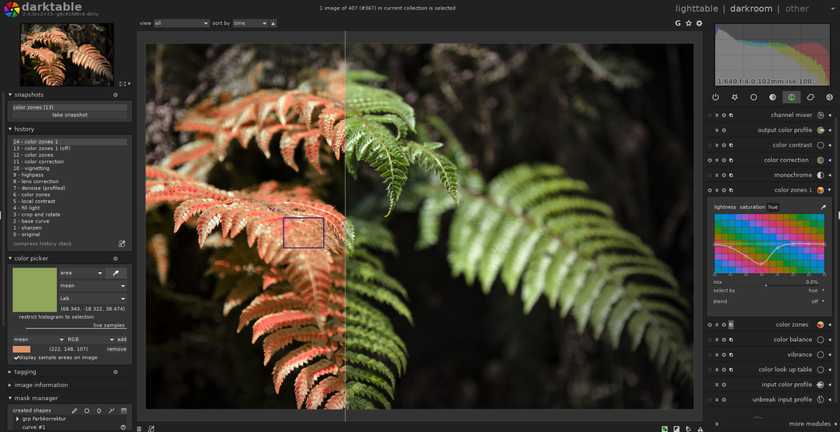
Darktable is a free and open-source cross-platform that is a good alternative to Lightroom. After all, it has functions and interface that imitate the Adobe product. Created by American and European developers in tandem with photographers, this editor is a find for all creative people who work with images. It offers a number of powerful tools and functions for various image editing tasks, from adjusting contrast and saturation to global color correction. In addition, you have the opportunity to manage multimedia content here. In Darktable, like in Lightroom, you edit photos without significant damage. That is, if you’re not satisfied with your result, you can easily undo the changes you have made or make corrections to them. This program is a Lightroom alternative because it’s also capable of processing many photos of various formats, including RAW from more than 400 different cameras. It easily replaces the real lighttable and darkroom that professional photographers use during shoots in the studio.
What are the Benefits of this Software?
Automation is a highlight of this open-source program. What does it mean? If you notice that your constantly repeated actions are slowing down your work, simply set them to perform automatically! This way, you can devote the saved time for more global editing or a break for a cup of tea and sweets. Another feature of this software is that it helps you easily and quickly find the images you need in the database by such parameters as tags, ratings, and others. It’s a great workhorse for office work on a laptop or a desktop because it’s available for Windows, Mac, and Linux.
You’ll also like the following benefits of Darktable:
- Tools that provide great opportunities to get amazing results. Thus, here, you can radically correct the colorby diluting it with another shade. Or you can add another color to the photo. Sharpen tool is a great solution if your image lacks sharpness. Thanks to it, you can achieve a realistic effect. All you have to do is play around with the three sliders: Amount, Radius, and Threshold. But do it carefully so that the photo doesn’t turn out too sharp. Also, it is worth paying attention to shadows and highlights tools. They will come in handy if you need to correct dark or light parts of the image.
- Easy to use interface. There are 5 consecutively located modules that can be easily understood even by a photographer who is just starting to take his first steps in image processing.
- Convenient cataloging. If you work with a huge number of photos, this program is perfect for you because it allows you to sort content by various parameters and add it to your collections.
- Ability to work with more than 15 formats. JPEG, PNG, HDR, and RAW photo formats are among them.
However, Darktable is not without flaws. You won’t be able to continue work on your smartphone or iPhone while going home on the subway, sitting on the bench in the park, or elsewhere. The main reason for this is the absence of versions for Android and iOS operating systems. And this software doesn't work with Adobe products, which limits your ability to work with photos. Besides, you may not like the results of image processing. After all, you’ll not get such crisp and clear images as in Lightroom.
Advanced yet easy-to-use photo editor
GET LUMINAR NEO NOWImage Editing is a Main Part of the Darktable Interface
Editing tools provide ample opportunities to make your images attractive and impressive. You can achieve it with the help of 5 modules:
- Lightable – designed to manage photos, exports, imports, and more.
- Darkroom – a peculiar photo laboratory where images are directly processed.
- Map – as in Lightroom, allows seeing on the Google map the place where the photo was taken if it has geotagging. You can also add location information if the image doesn’t have tags.
- Slideshow – here you can see a slide show with the photo collection you have chosen.
- Tethering – it allows you to take photos with your camera in real-time mode in the Darktable.
It is worth considering the Darkroom module separately because this is where you do the most interesting work. Among the main tools here, you’ll find the following:
- color correction;
- white balance;
- contrast
- exposure and saturation;
- highlight/shadow balance.
Masking and blending are also available for you. At first glance, it may seem that working in this editor is very difficult. But Darktable offers you a lot of clear lessons from the user manual guide.
What Additional Functions does Darktable Have?
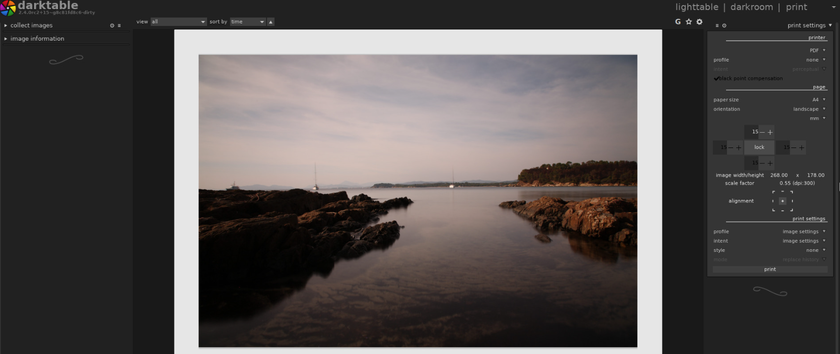
Darktable hasn’t have built-in presets. But, however, you have the opportunity to add your own collection of presets as well as give a vintage note to your image thanks to the grain function.
For Whom this Program will be Useful?
This is a great alternative for beginners photographers who are looking for free software. But it’s also suitable for professionals who don’t want to pay every month for subscribing.
Darktable vs Lightroom: Key Differences
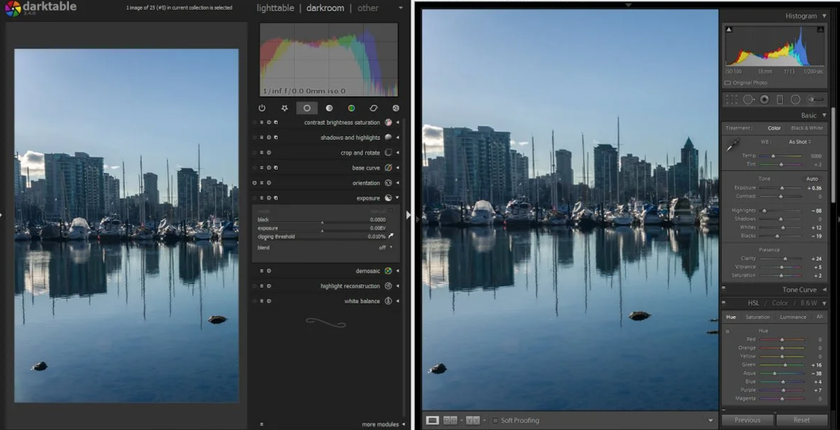
So, we’ve looked at each photo editor separately, and we can say with confidence that both programs are similar to each other and provide amazing results. But there is some difference between them. Let’s compare them by the following key parameters:
1. Interface and Usability
The Lightroom interface is made in a minimalistic design with a dark frame and 7-well organized modules. That’s why working in this editor, just like in Photoshop, is very convenient. The navigation is intuitive even for those who are a beginner in photo processing. This means you can easily and quickly get into the workflow. As for Darktable, at first glance, its interface looks similar to that of Lightroom. It also has several modules, the main image is placed in the central part, and you make the main changes in the editing panel using sliders. But when it comes to finding a specific command, you get a little confused. This means it will take you longer to get to the tools and functions of the menu.
2. Library
File management is quite flexible in a neat and well-organized Lightroom library. Important things like catalog settings and collection folders are immediately apparent. And the ability to search for photos by keywords, rating, and other filters speeds up your workflow. At the same time, Darktable is difficult to search for a specific file, even though it has filtering systems. And when exporting an edited image, it offers fewer file creation options.
3. Edition Tools
The Lightroom tools are arranged linearly, that is, from top to bottom. Therefore, you can use or ignore some of them while processing photos. Another feature there is the built-in presets that are not available in Darktable. Together with extensive control over exposure, colors, and other parameters, this makes the program ideal for professional photographers. As for Darktable, here you’ll have to a little tinker because the workflow here seems a bit chaotic. It’s complicated by the placement of editing tools. To find them, you first need to scan from left to right and find the necessary tools within each tab, which is very inconvenient. But this software also has its advantages, such as masking tools and the function of combining masks. Here you’ll also find such tools as Bloom, Framing, and Zone system that are not in Lightroom. However, this software is suitable for beginners who need to do simple editing tasks.
4. Image Quality
Lightroom wins in this regard because it has more robust and professional tools in the Develop module. In particular, it allows you to make a beautiful contrast thanks to such tools as hue saturation luminescence. And you get clear images with excellent color reproduction. Darktable has somewhat weak tools and its plugins are outdated. So, in this case, you can face a problem when you need to create an effect that meets the latest trends in the photo editing industry, but this software can not give it. In addition, the finished result may not please you because of the slight blurring of the photos.
5. Price and Customer Support
This is a significant difference between these two programs. Darktable is free open-source software. This means that even students can afford it. Moreover, it’s available for many operating systems. But there is one significant disadvantage: the lack of a support team to contact in case of a certain problem. As for Lightroom, it is available only by monthly subscription, which not even every professional can afford. Instead, you get a truly professional workspace with high-quality tools, ongoing support, and integration with Photoshop and other Adobe products.
Conclusion
As you can see, both photo editors are ideal for processing images in different formats. But there are some differences between them. Thus, Darktable is free and has limited opportunities, therefore accessible to beginners and professionals who have a limited budget. At the same time, Lightroom is paid, but it fully pays for itself with professional-level tools, an intuitive interface, clarity of edited images, and the ability to work in tandem with Photoshop for amazing results.
FAQ
Can I Use Darktable and Lightroom in Tandem?
Darktable isn’t integrated with Adobe products. So, you can not use it with Lightroom, like Lightroom and Photoshop. But you have the opportunity to edit photos independently. For example, first, you can play with color correction, contrast, and other basic settings, and then open your saved image separately in Lightroom to apply beautiful built-in presets.
Is Darktable Difficult to Learn?
Although this program seems a bit confusing, you will easily master it with time. After all, it has tutorials that easily explain the main tools and functions of the program.
Can I Export My Photos from Darktable to Other File Formats?
Yes, of course! Dartable offers wide opportunities for export. You can export your ready-made images in such popular formats as JPEG, PNG, TIFF, and more depending on your needs.


