How to Photograph Mountains Up Close
July 10, 2024

Explore the beauty of mountain ranges up close and capture the breathtaking landscape with a wide focal length. Discover the thrill of photographing jagged rocks and snow-capped peaks in all their grandeur.
The grand expanse of a mountain range is always a thrilling experience to capture. A long, arduous hike to your shooting point is rewarded by a view of jagged rocks and snow-capped peaks. With a wide focal length, you can capture all of this and perfectly illustrate the breathtaking landscape. However, what if you took a step closer? What can we achieve by photographing mountains up close, and can we still communicate the enormity of the mountain range and its environment? That is exactly what we are going to take a look at today.
Advanced yet easy-to-use photo editor
Get Luminar Neo NowUnderstanding Mountain Photography
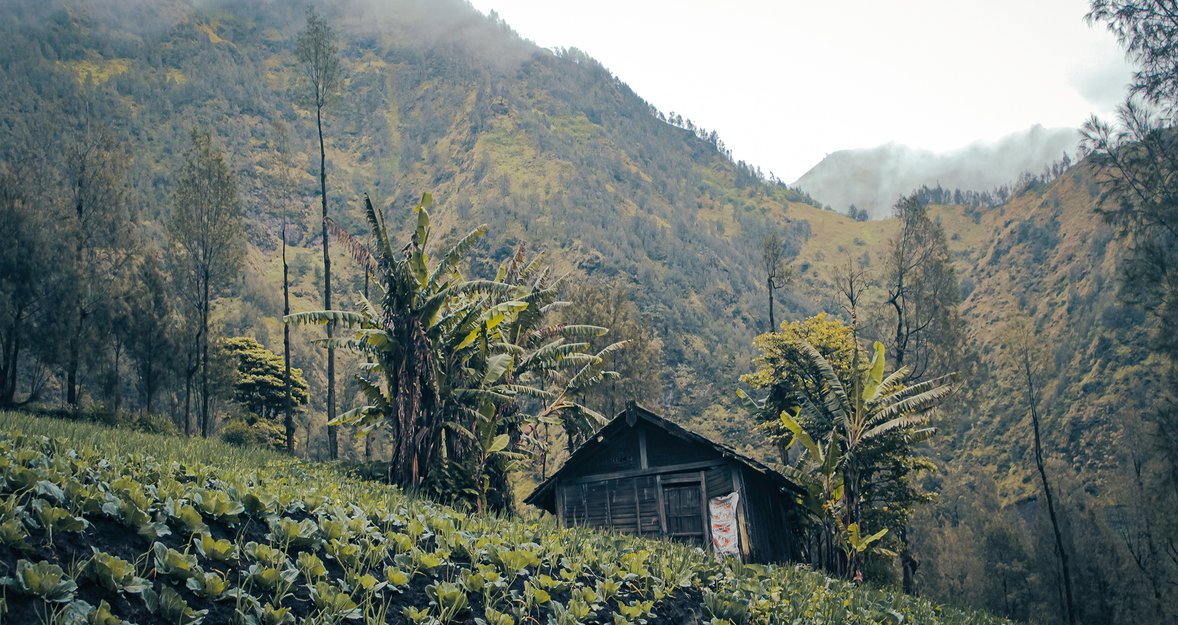
 Mount Bromo, Indonesia: Extremely sleep-deprived, I woke up at 3 am to capture the sunrise over the active volcano of Mount Bromo in Indonesia. My friend and I set off for Mount Bromo on a moped, and it was only halfway there that we realised to see the sunrise over the volcano, we couldn’t actually be on the volcano itself; we needed a vantage point. This became all too apparent (and amusing) once we had woken up properly, prompting an about-turn to head for a vantage point a few kilometres away.
Mountain photography isn’t just about capturing an image of a mountain, but also about showcasing it in its best light and conveying to the viewer the significance of its size and the environment in which it's situated. I aimed to capture the sun creeping up behind the smoking volcano, highlighting the warm glow and the contrast between shadows and light. Instead, what I captured was something a little different. Whilst I was enjoying looking up at the stars and the gradual light of morning fading in, a dense wall of fog swept in, and suddenly visibility was reduced to about 10 metres. Just like that, the shoot was ruined, and I had very little chance of capturing a sunrise over Mount Bromo. That is the reality of mountain photography; you are at the mercy of the weather, which can change in the blink of an eye.
Thankfully, if our goal is to capture the details of the mountain up close, this may not be as much of an issue, yet it still presents a challenge. But first, let’s ensure that you are well-equipped before heading out for mountain photography.
Camera and Gear Essentials
 When venturing into mountain photography, which starkly differs from urban settings, it is crucial to be well-prepared, considering both the unpredictable weather and the demands of hiking.
Camera Essentials
1. Telephoto Lens
While wide-angle lenses are typically favoured for expansive mountain shots, focusing on details up close benefits from a versatile telephoto lens. This allows for capturing broader scenes as well as zooming in on textures and details.
2. Macro Lens
The mountain terrain is rich with micro-details such as unique plants, insects, and intricate rock textures. A macro lens will enable you to capture these up close, making it a valuable addition to your kit.
3. Spare Batteries and Memory Cards
Mountain photography is typically a full-day photography trip, you will need plenty of power and space to get you through.
4. Polarizing Filter
This filter is crucial for reducing reflections from water and foliage, enhancing the clarity of elements like mountain lakes, allowing you to capture the life beneath the water’s surface without the distraction of surface reflections.
Hiking Essentials
For those new to landscape photography, your hiking equipment needs to be as carefully considered as your photography bag:
1. Appropriate Footwear
Ensure you have sturdy, comfortable boots suited for mountain terrain.
2. Weather-Appropriate Clothing
Dress in layers to adapt to rapid weather changes, and ensure your outer layer is waterproof.
3. Waterproof Backpack
Protect your gear from the elements with a waterproof backpack.
4. Water and High-Energy Snacks
Stay hydrated and energised during long hikes.
5. Navigation Tools
Carry reliable navigation tools to maintain your bearings in unfamiliar terrain.
Safety Essentials
 Mountain photography comes with its risks, so make sure you put your safety first:
1. Phone and Portable Charger
Ensure you have a means to communicate in case of emergency.
2. Headlamp or Flashlight
Essential for early morning hikes or when conditions grow dim.
3. First Aid Kit
Always be prepared for minor injuries or medical needs.
4. Sun Protection and Insect Repellent
Protect yourself from the sun and pests to ensure your focus remains on photography.
5. Multi-Tool or Knife
A versatile tool can be indispensable in unexpected situations.
Always prioritise safety and preparation. The weather in mountainous areas can change rapidly, and being well-prepared ensures you can focus on capturing stunning photographs without unnecessary risks.
Best Times to Shoot
 The best time to shoot largely depends on the environment you find yourself on the mountain. If surrounded by dense foliage, you'll likely contend with low-light conditions. In contrast, a mountain with bare rock and sparse vegetation will provide abundant light but expose you more to the elements. In such open environments, golden hour is ideal, providing soft, flattering light. Midday sun, with its potential lack of shadows, might not offer the most flattering or contrast-rich images. However, if the foliage is thick, shooting at midday can be beneficial to maximise available light and avoid increasing the ISO, thus achieving crisper, cleaner images.
Exclusive Tools of Endless Possibilities in One AI Editor
EXPLORE NOW!10 Creative Ideas For You to Try
 Now that you’re well-equipped and know the best times to venture out, let’s provide some creative ideas to inspire you on your hike.
1. Mountain Paths
Hidden pathways that have formed naturally over time on the mountainsides are full of rich detail and offer a glimpse into the mountain’s environment. Capturing a path is fascinating because you can return throughout the year and observe its changes across the seasons. Look for picturesque paths with a canopy of trees or rugged trails with stunning views.
2. Mountain Streams
Similar to the paths, returning throughout the year to capture the streams and seasonal changes can be rewarding. Try to capture close-up details of the stream, such as the surrounding plant life or any aquatic life beneath the surface.
3. Mountain Huts
Scattered along the paths, you may find huts used by mountain rangers. These provide excellent subjects for documentation, and if you’re planning to shoot several mountains in the area, they can form a great collection of photos. If a ranger is present, consider asking for a portrait and documenting some of the stories they have about the area.
4. Wildlife
A good telephoto lens, preferably with a considerable focal length, is essential here. Capturing wildlife is a genre in its own right, and your chosen mountain may be teeming with a variety of animals. A telephoto lens allows you to capture images safely without disturbing the wildlife.
Best Camera For Bird Photography 2025
Learn more5. Geological Layers
 Capture the history of the mountain by photographing its geological layers. Look for visible rock layers, known as strata, on the sides of the mountain and in large rock formations such as cliff faces.
6. Textures
Mountains are rich with textures, from rugged stones and rocks to the foliage on the peaks. Use your telephoto lens for distance shots or a macro lens for close-ups.
7. Weather
Documenting weather conditions like fog, rain, and snow can add interesting moods and atmospheres to your photos, enhancing other subjects such as footpaths and mountain huts.
8. Portraits
The mountain provides a diverse range of backdrops for portraits, from bare rock to lush foliage, enabling you to create captivating images on the mountainside.
9. Light Play
On bright sunny days, photograph the play of light through the canopy of trees above. This creates interesting shadows and is something to consider if you are taking portrait shots.
10. Campers and Hikers
Capture images of fellow campers and hikers you meet on your hike. They can add interesting stories to your photos, and with camping gear often being brightly coloured, they provide a nice contrast against neutral backdrops.
While hiking, keep your camera ready for action at all times. You never know what you might encounter as you climb. Take photos of anything that catches your eye and remain curious about everything from geological layers and formations to tiny details like textures and insects.
The Bottom Line
Although dense fog set in during my attempt to photograph the sunrise over Mount Bromo, my day wasn’t completely ruined. I captured elements of the environment that began peeking through the fog, such as trees and peaks, creating a moody aesthetic which I particularly enjoyed.
Later in the day, after the fog had lifted, it remained very grey and cloudy. A standard shot of the volcano wouldn’t have been as appealing, so we travelled closer to the volcano. What I captured there was far more interesting to me. Around the volcano, people were travelling on horseback to and fro. Vendors were selling snacks halfway up the trail to the peak, and then on the volcano itself, I witnessed something I still haven’t forgotten to this day. The smell of sulphur was strong, but I could see right into the volcano from the ridge, and observed the large column of smoke rising up close. I also captured the textures and layers of the sides of the peaks that closely surrounded the volcano.
Mount Bromo remains one of my favourite shoots of all time, and it goes to show that even if you don’t get that grand picturesque view you were aiming for, there’s still plenty to shoot if we get a little closer to our mountain. Also, a word of caution: I got the worst sunburn of my life being that high up, even with dense cloud cover, so just a heads up if you’re reaching high altitudes. Enjoy your hike!


