How to Edit Macro Photos with Luminar Neo: Application Tips and Extens
May 17, 2024

Welcome to the dynamic world of macro photography editing! In this blog post, we'll learn about 5 Luminar Neo tools to make your macro photos look professional.
Hello, this is E-M-W.
Skylum’s Luminar Neo has various functions that make it easy to edit any subject. Today, I will show 5 tools that will definitely make your macro photos pop. Without further ado, let’s get started!
1. Crop AI: Perfecting Your Photo’s Composition

Cropping is an essential part of editing macro photography. By cropping, you can eliminate unnecessary elements and magnify important parts of the image, thereby enhancing the impact of macro photos.
I recommend using the Crop AI tool in Luminar Neo for this purpose. This tool not only allows basic cropping but also offers advanced features like changing the aspect ratio, making horizontal adjustments, rotating, flipping, and utilizing Composition AI.
For example, in the rose photo above, I used the tool to remove slightly obstructed green leaves, which sharpened the focus on the rose flower.
If you are uncertain about how to crop effectively, try using the Composition AI feature. It uses the built-in artificial intelligence of Luminar Neo to automatically suggest an initial crop, which you can then adjust to find the optimal composition.
2. Erase Tool: Effortlessly Clean Up Dust and Dirt

When editing photos on your PC, you may notice small specks of dust or dirt that were not visible when taking the picture or on your camera's LCD screen. It's important to remove these imperfections to ensure your photos look their best.
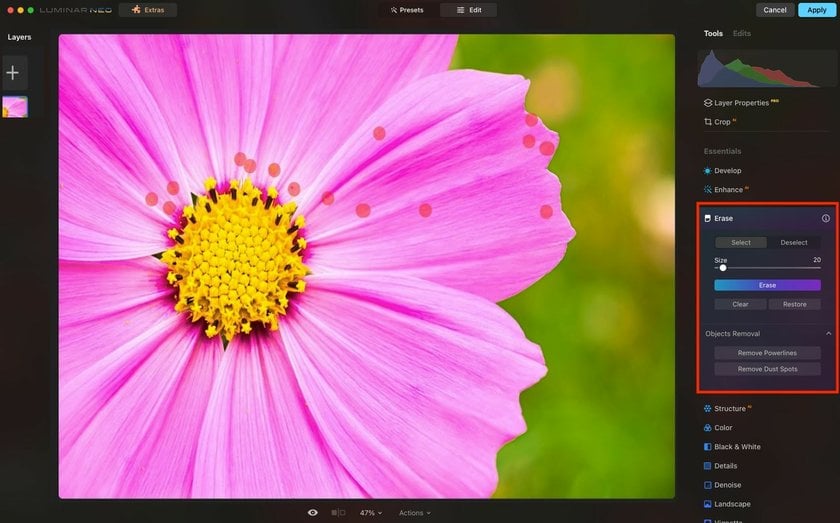
In Luminar Neo, start by selecting the Remove Dust option located within the Remove Objects section of the Erase Tool. This feature utilizes AI to automatically identify and clear away dust particles, significantly reducing your editing time.
However, the automatic process may not catch every speck. For any remaining dust, you'll likely need to switch to manual adjustments. Use the Erase tool manually, and consider enlarging your view on the screen to better spot and meticulously remove any small dust particles.
Advanced yet easy-to-use photo editor
Get Luminar Neo Now3. Supersharp AI: Sharpen and Clarify Your Images

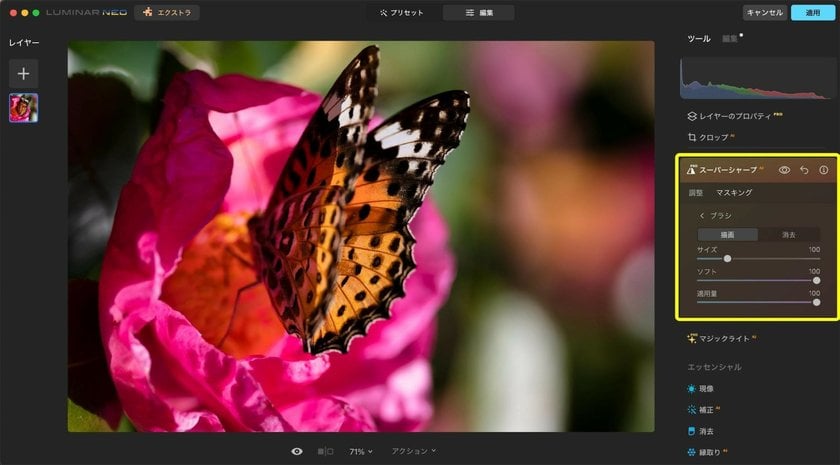
If you experience reduced sharpness due to slight blur or focus issues when taking macro photos, you can enhance it using Luminar Neo’s advanced feature, Supersharp AI.
Supersharp AI provides two types of correction methods to improve sharpness:
Universal: This method enhances overall sharpness across the entire image.
Blur (Motion): Specifically improves sharpness in areas affected by camera shake or motion blur.
If sharpening effects appear in areas where they are not needed, you can use the masking tool to control the area affected by the effect finely. This allows for precise adjustments to ensure optimal image quality.
4. Focus Stacking: Master Depth of Field in Macro Photography
Macro lenses excel at magnifying small objects, but their close proximity to the subject results in a very shallow depth of field. While this shallow depth of field can create stunning bokeh effects, it can be problematic when you need the entire object in focus, such as in product photography.
To increase the depth of field, you might start by adjusting the lens’s F-stop. However, this alone may not suffice to bring the entire object into focus.
If traditional camera settings do not achieve the desired clarity, consider using Luminar Neo’s "Focus Stacking" feature. Focus stacking is an editing technique that merges multiple images, each taken with different focus points, into a single composite photo with an expanded in-focus range. This method proves particularly valuable when standard camera adjustments fall short.
To use focus stacking, load multiple photos into Luminar Neo, drag and drop them into the Focus Stacking window on the catalog screen, and click Stack.
The photo of the ring on the left was taken with a macro lens at the maximum aperture of F22. Despite this small aperture, the entire photo was not in focus. The photo on the right is a composite of 30 images, each taken at different focal lengths using focus stacking.
Comparing these two photos, it's evident that the focus stacking technique results in a photo that is significantly more in focus.
5. Presets: Instantly Apply Professional Edits
We recommend utilizing presets in Luminar Neo to simplify the editing of macro photos. The software offers two preset collections specifically designed for macro photography: "Objects" and "Nature," encompassing a total of 12 presets.
Additionally, you can explore a range of high-quality macro preset collections crafted by professional photographers and editors that are available for purchase on the Luminar Neo official website marketplace.
For instance, I will demonstrate using the "Macro Dark Mood" preset from the signature collection "Invisible Worlds" created by Luis Miguel Azorín Albero, which is available on the Marketplace.
By applying professionally designed presets you can easily achieve atmospheric effects in your macro photos. After applying a preset, the editing module in Luminar Neo allows you to see and learn from the tools and editing techniques used within the preset. This is an excellent way to understand and perhaps replicate professional editing styles.
Lastly
We have explored the top 5 tools in Luminar Neo that are ideal for editing macro photos, enhancing your ability to perform advanced edits. Now, dive into Luminar Neo and enjoy the process of refining your macro photography!


