Hand Poses: Master the Art of Expressive Hands in Photography
Last Updated on September 17, 2025
Ready for quick wins? These handy tips for hand poses in portraits will make every gesture sing.
Hands tell stories. A single fingertip at the jaw, a relaxed palm resting on a knee, or a quick brush through hair can shift the mood of a portrait from formal to intimate. Photographers who learn to place hands with intent gain a powerful tool for shaping emotion, guiding the viewer’s eye, and improving overall composition.
This guide focuses on clear, usable techniques and concrete examples that produce stronger portraits quickly.
Why Are Hand Poses Important in Portrait Photography?
Hands change scale, line, and story inside a frame. A palm near the face creates intimacy and leads the viewer to the subject’s expression. Placing it on a hip adds tension and attitude. Proper placement helps with balance: a single, well-posed gesture can counterweight a tilted head or an asymmetrical pose. Learning basic portrait photography composition makes these choices easier and more effective. When planning how gestures will interact within the frame, consulting a short primer on composition can be very helpful.


12 Best Tips for Hand Posing in Portrait Photography
Treat movements as part of the subject’s language. The following tips are specific, example-driven, and ready to use:
1. Relax the Hands for a Natural Look
Tension reads on camera. Encourage the model to shake or wiggle fingers between moments. A relaxed gesture will show subtle curves. For example, a loose hand resting on a thigh looks more elegant than one clenched behind the back.


2. Use Props for Engaging Hands Pose
Props give purpose and reduce awkwardness. Good choices: a ceramic mug, a paperback, or a lightweight scarf.
Quick rules for props:
Choose props that match the story (vintage book for nostalgic portraits).
Keep sizes small so fingers remain visible.


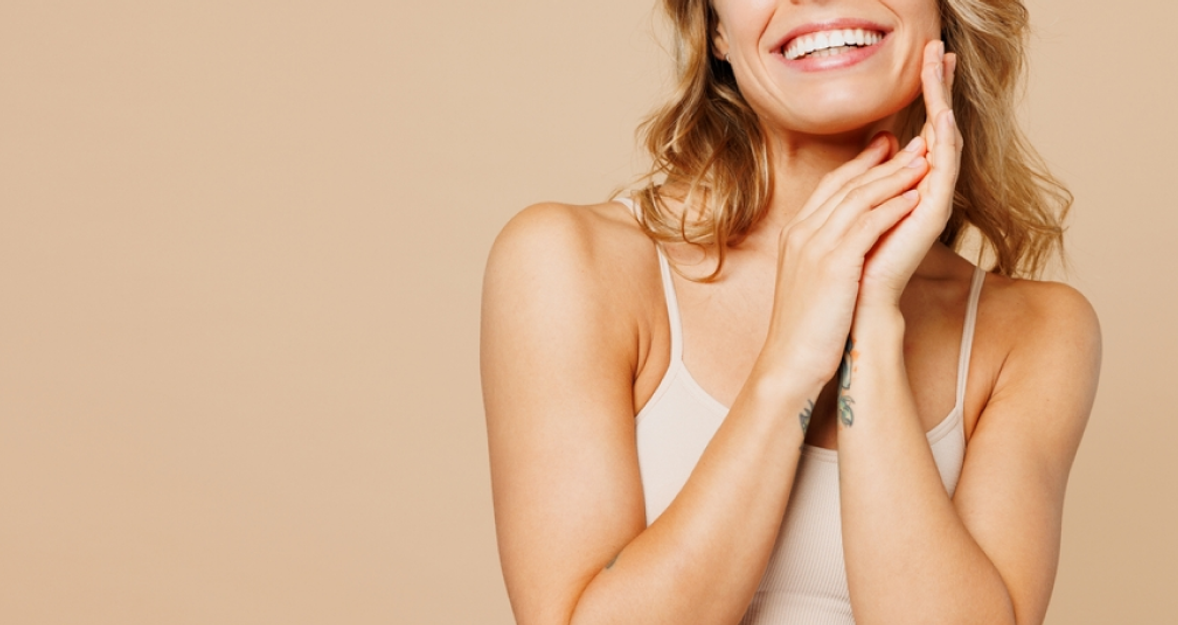
3. Hands-on-Face Poses for Drama and Elegance
Light-touch placements, like the index finger at the temple or a thumb under the chin, create tension without hiding the face. For a soft editorial look, place fingertips at the cheekbone and angle the wrist slightly toward the camera to catch catchlight.


4. Play with Angles to Flatter Hand Shapes
Shooting slightly above a raised gesture slims its appearance; shooting from below can make fingers look larger. When the goal is slimming, rotate the wrist so the inner edge faces the camera — that creates a clean, elegant line.


5. Create Action with Busy Hands Poses
Movement adds life. Capture a subject smoothing a sleeve, adjusting a cuff, or throwing hair back. These candid moments often produce the most honest expressions.
The Definitive Solution for Picture-Perfect Portraits
DISCOVER TODAY!


6. Highlight Body Parts with Delicate Hand Placement
Use a fingertip to point to a detail — glasses, a collar, a necklace — rather than covering it. For example, a single finger resting on the collarbone draws attention to that area without competing with the face.


7. Crossed Hands and Arms for Strong Poses
Crossing wrists near the torso creates compact strength. For a softer look, cross only the wrists and keep fingers relaxed to avoid a defensive stance.


8. Couple Hand Poses: Tell a Story of Connection
Small contact, such as thumbs touching, fingers intertwined, reads as closeness. In engagement portraits, have the couple cradle each other’s palms with the inner edges slightly apart; the resulting negative space between the palms feels intimate.


9. Hands Raised for Playful and Creative Shots
Raised gestures, like waving, shielding eyes, or framing light, introduce rhythm. To keep the face visible, ensure the raised arm’s edge aligns with the hairline or background light.


10. Hands in Pockets: Casual and Cool
A thumb hooked in a pocket reads relaxed; fully buried hands appear withdrawn. For an approachable vibe, use the thumb-and-index hook.


11. Action Poses: Leaning, Supporting, or Resting Hands
A palm on a table or a wrist leaning against a wall gives context and ballast. Example: an elbow on a chair with fingers tracing the edge suggests thoughtfulness and calm.


12. Creative Hands: Shape and Frame with Gesture
Use hands to frame the face or create shapes that echo other elements in the photo, like the curve of hair or the neckline of clothing. This repetition adds harmony and draws the viewer’s eye back to the subject.
Exploring different poses for portrait photography gives you structured options to experiment with, from subtle framing gestures to bold, geometric shapes that add drama.


Avoid These Mistakes When Hand Posed
A few common errors derail otherwise good images. The list below highlights frequent mistakes and how to fix them:
Clenched fists or rigid fingers.
Wrists cut off at awkward places (missing knuckles or fingertips).
Symmetrical placement that makes both hands identical and static.
Tucking palms behind the back or blocking the face.
Fixes are simple: loosen the fingers, reframe to include the entire limb, break symmetry with a different wrist angle, and use props or surfaces to rest the palm naturally. For a deeper dive into the topic, check out our guide to avoiding common portrait photography mistakes, where you’ll find practical examples and solutions.
How Luminar Neo Enhances Your Hand Posing Photography
Luminar Neo streamlines post-processing for portraits where subtle details matter. As a powerful photo editor, it speeds up routine corrections, such as exposure, contrast, and crop, which is useful when hands change the image’s focal points. Quick global adjustments can balance skin tones and recover detail in shadowed fingers that might otherwise fall flat.
Beyond base edits, Luminar Neo offers tools that refine skin and texture while preserving natural lines, especially useful when fingers touch the face. The skin retouching AI features preserve realism while improving tone and clarity, so soft touches look polished without appearing artificial.
Your AI-Powered Photo Editor for MacOS and Windows
Discover Now!FAQ
How do I avoid hand positioning mistakes in close-up shots?
When possible, include the full palm in the frame, watch for distracting veins or shadows, and keep the wrist soft. A tiny adjustment — rotating the wrist one inch — often fixes a shadow that would otherwise age the gesture.
How can I pose my hands to make them look elegant in photos?
Use long lines: extend the fingers gently and slightly separate them. Rest fingertips on a surface or along the collarbone to create graceful angles.
What props work best for creative hand poses?
Small, tactile objects — a scarf, cup, or hat — work best. They give fingers something to do without stealing the story.
How can I make my hands look smaller in photos?
Rotate the wrist so the inner edge faces the camera, keep fingers close together, and shoot from slightly above. Avoid flat, palm-out angles that widen the hand.
What are the best hand poses for beginners?
Start with simple supports: one palm on the hip, a thumb hook in the pocket, or a light touch to the cheek. These are forgiving and teach balance and sightlines.