January 01
9 min. to read
How to Edit a Shadow Out of a Photo for a Clean Look
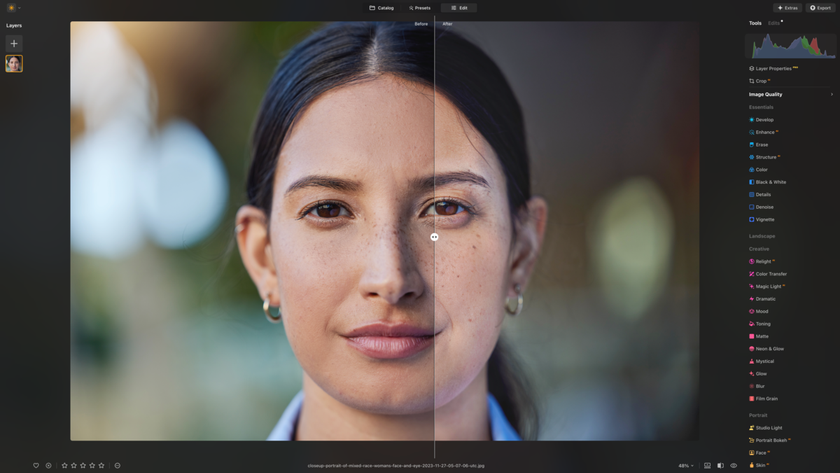
 Photography is the art of controlling light in the image, but where there is light, there will also be a shadow, which is often an essential part of the storytelling process, allowing the photographer to add depth, contrast and texture to the image. But what do we do when the shadow does come in the way of the creative vision, acting more as a distraction?
Regardless of whether we want to make the subject more visible, create a cleaner-minimal look, or correct a harsh light, Luminar Neo offers several tools that allow us to minimize or get rid of shadow in a picture.
In this blog, we'll explain how to take shadow off a picture and highlight the best tools in Luminar Neo to help you master this technique quickly.
Which Tools in Luminar Neo Are Best for Shadow Removal?
How to get shadows out of pictures easily? Below are the best tools to use in Luminar Neo for this task:
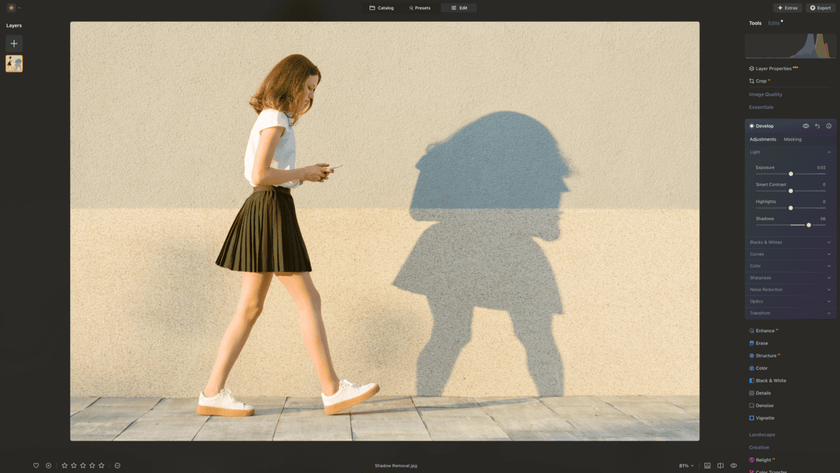
Develop Tool: The Develop tool, with its Brightness and Shadows sliders, can help minimize the shadows, especially when combined with masking.
Dodge & Burn Tool: Similar to the Develop tool, the Lighten brush in the Dodge & Burn tool helps to adjust the amount of shadows in the image.
Clone & Stamp Tool: The Clone & Stamp tool precisely remove shadows by replacing them with nearby textures. It is often used to fine-tune the result after removing the shadows using the Erase or GenErase tools.
Erase Tool: The Erase tool is helpful for removing smaller, more defined shadows in the image.
GenErase Tool: GenErase offers a great starting point for more complex shadow removals, with the possibility of selecting a specific area and erasing or replacing it using the generative AI features built in Luminar Neo.
Step-by-Step Guide to Removing Shadows
Follow these simple steps on how to remove shadows from photos using Luminar Neo:
Step 1: Get to Know the Shadow Before You Start
Before you start thinking about how to get rid of a shadow in a picture, it's important to understand the shadow you're working with. To do this, import the image into Luminar Neo and examine the shadow to determine its type (hard with defined edges or soft with gradual transitions), size, complexity, and lighting.
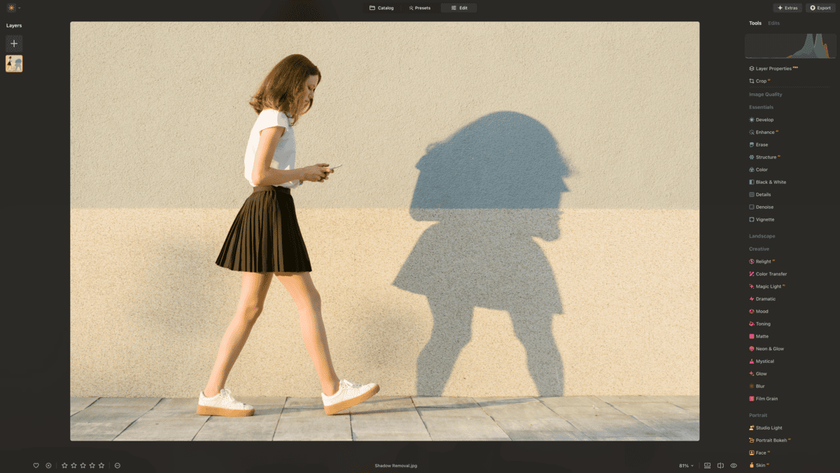
Step 2: Start Softening the Shadows with Basic Tools
Once you've analyzed the shadow, you can start with the editing. Start by minimizing the shadows using the Develop or Dodge & Burn tools. Then, depending on the shadow, you can gradually increase the Shadows slider to brighten the darkest parts of the image without affecting the overall brightness. If the shadowed areas remain too dark, gently increase the Exposure slider.
At this stage, you can also experiment with studio lighting effects to further enhance the image and achieve a more balanced look.
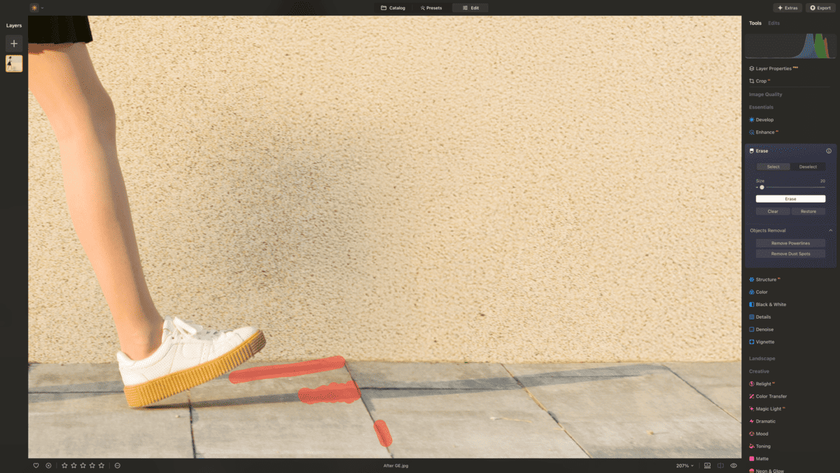
Step 3: Erase the Big Shadows with the GenErase Tool
After minimizing the shadow, you can remove the more significant parts using the GenErase tool. To do this, brush over the shadow, making sure to include some of the surrounding areas. Once the shadow is selected, click the Erase button. Some shadows might not be entirely erased in one attempt. If you notice imperfections, brush over the remaining shadow and repeat the process.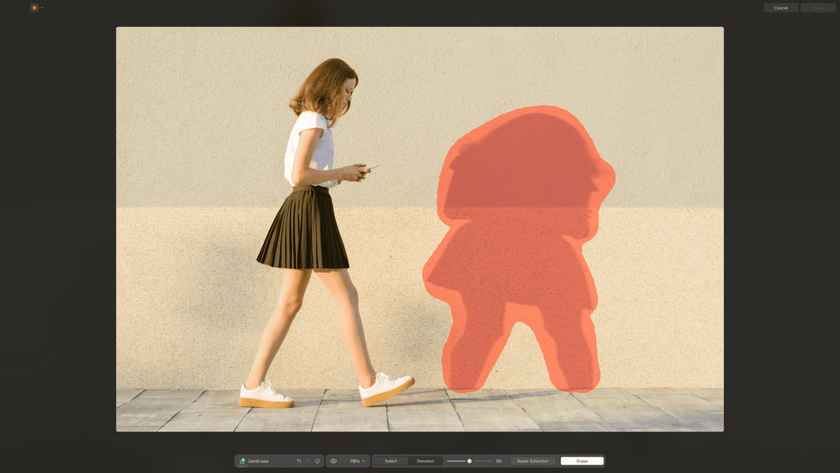
Step 4: Clean Up the Small Stuff with the Erase Tool
If necessary, use the Erase tool on any smaller parts of the shadows that are still visible. Use the brush to select the areas and include extra space around the shadow for best erasing results.
Step 5: Perfect the Details with the Clone & Stamp Tool
Smaller parts may still be visible once the major portions of the shadow have been removed using the GenErase tool. To fine-tune the result, use the Clone & Stamp tool on any challenging parts, using the sampling brush (available while the Alt/Option key is pressed) to simply clone and stamp the texture without the shadow in it.

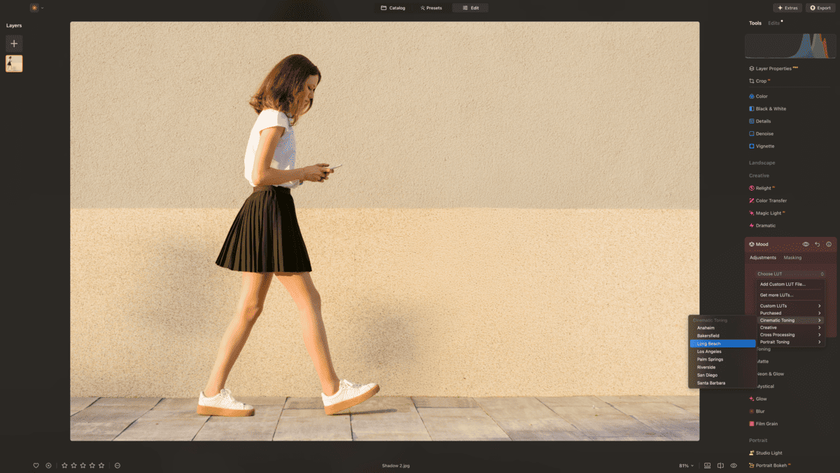
Step 6: Add the Finishing Touches
Once the shadow has been successfully removed and the image looks cleaner, you can enhance your photo further using Luminar Neo's powerful tools. Try adjusting the Mood tool, fine-tuning with Enhance AI, or sharpening details with the Details tool. You can also add creative effects, such as an image tint, to give your photo a unique finishing touch.
By following these steps, you can easily remove shadows from your images while maintaining a natural and polished look.
How to Erase Shadow in a Picture: Pro Tips
To get the best possible result when removing shadows from images, it is essential to avoid a number of common mistakes, which can impact the photo and make it look fake and unrealistic.
To remove shadows from a photo, it's not enough to erase the most visible parts. Pay attention to the details and remove all parts of the shadows, even the subtle edges and scattered traces. As mentioned above, Luminar Neo offers many tools to remove shadows with precision.
While it's tempting to keep tweaking a photo to perfection, applying too many adjustments can lead to unnatural results that draw attention to the editing rather than the subject of the image. Keep an eye on overediting by applying too many adjustments to keep a more natural look.
Pay special attention to the edges of the elements around the shadows and make sure they are correctly blended. Poorly blended edges can make your edits look obvious and unnatural, drawing attention to the fact that a shadow was removed.
Shadows can sometimes feel like a distraction, but they also create depth and dimension in a photo. Therefore, think about the shadow's role in the image's overall composition before removing it.
Conclusion
Removing a shadow from an image can be a creative and fun process, allowing you to transform your image using a number of tools in Luminar Neo. While it may be a slower process, it will allow you to get even more familiar with its editing possibilities. The quality of the final result will depend on your attention to detail and patience with combining all the techniques you have learned in this article. But just like with many advanced editing techniques, the more you practice, the better and more efficient you'll be at it.
