Orton Effect: Transform Photos for Dreamlike Atmosphere
November 21, 2023
Create stunning dreamlike photos with the Orton Effect. Transform your images into a magical atmosphere with this unique photography technique.
Hello, this is E-M-W. Skylum's Luminar Neo has many high-performance and unique features not found in other existing photo editing software.
I will introduce the Orton Effect this time, which can give your photos a fantastical feel.
What is the Orton Effect
Before I explain how to use the Orton Effect, I will briefly explain what it is.
The Orton Effect is a photographic technique that creates a dreamy, ethereal look by blending two images of the same scene: one sharp and one out-of-focus. Invented in the mid-1980s by Canadian landscape photographer Michael Orton, this effect was originally applied to film photography. The technique enhances the visual appeal of landscapes by introducing a soft, glowing quality.
I've never used a film camera, so I can't explain in detail, but by combining two types of photos, one that is out of focus and the other that is overexposed, you can create a blurred image that looks like a watercolor painting. The result is a photo with a unique atmosphere with bokeh and shine.
As you can see, the Orton Effect is an advanced technique devised by our predecessors during the film camera era, but using Luminar Neo, you can quickly reproduce this technique.
How to Use the Orton Effect
Let's edit photos using Luminar's Orton Effect!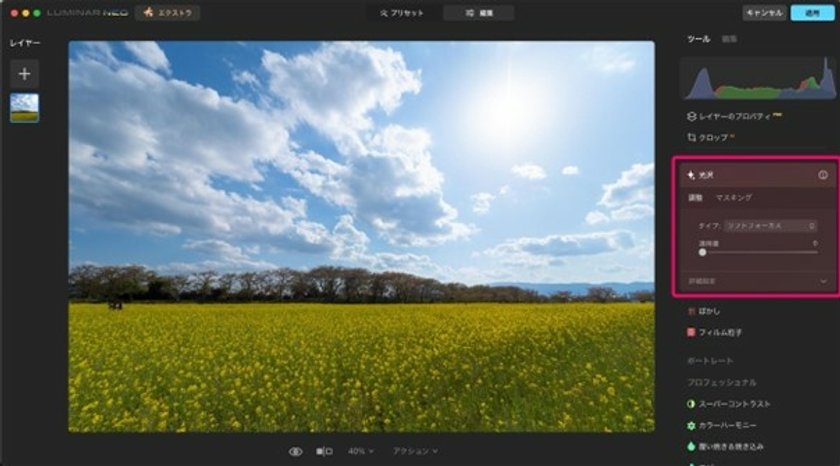 Select the Glow tool in the Creative section. There are four types of Glow tools to choose from: Soft Focus, Glow, Orton Effect, and Soft Orton Effect.
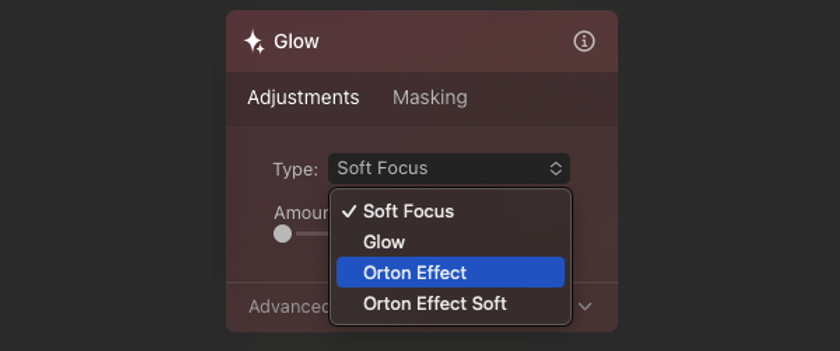
After selecting the type, use the amount slider to set the strength of the effect.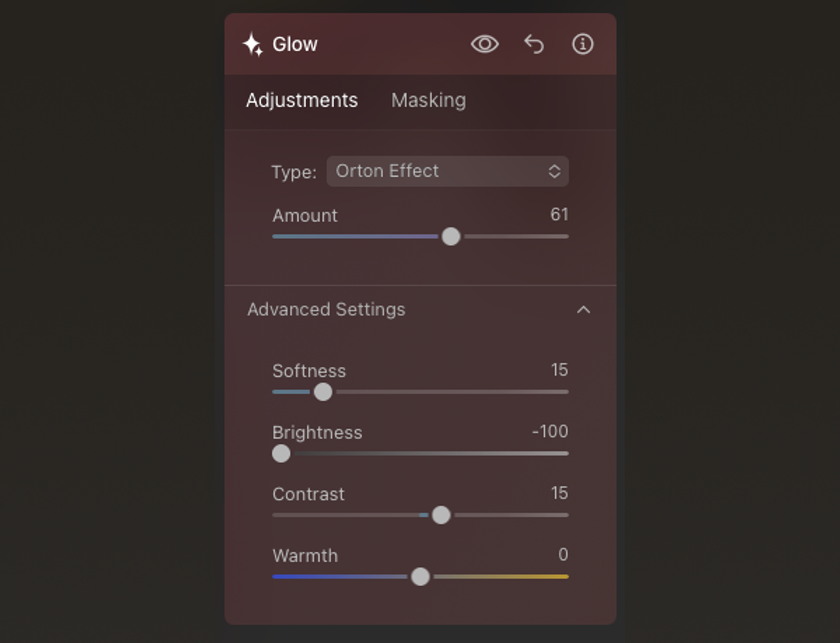
Clicking Advanced Settings will display a pull-down menu to adjust Softness, Brightness, Contrast, and Warmth.
Now, let's apply the Orton Effect to the photo.
The top photo is uncorrected, and the bottom photo is a photo corrected with the Glow tool/Orton Effect, amount 60, brightness -100.
Using the Orton Effect filter, you can create a unique effect of emphasizing the outlines while creating a soft, blurred atmosphere. By the way, with the Orton Effect, the brightness will increase proportionally when you increase the amount, so it works well if you set the brightness value to -100.
Orton Effect Example
The Orton effect is a technique devised initially by landscape photographer Michael Orton. Still, it is also highly effective for various subjects other than landscape photography, such as portraits, flowers, and animals.
Let's try out the Orton effect on subjects other than landscape photography.
Apply the Orton Effect to Animal Photos
The top photo is uncorrected, and the bottom photo is a photo corrected with the Glow Tool/Orton Effect: Amount 60, Contrast -20, Brightness -100.
The Orton effect makes it fluffy, and the Cavalier looks even cuter. In this way, the Orton Effect is also perfect for photos of adorable pets.
In addition, in this correction, the brightness was set to -100, and the contrast of the subject Cavalier was set to -20 to prevent the fur from turning black.
Apply the Orton Effect to Flower Photos
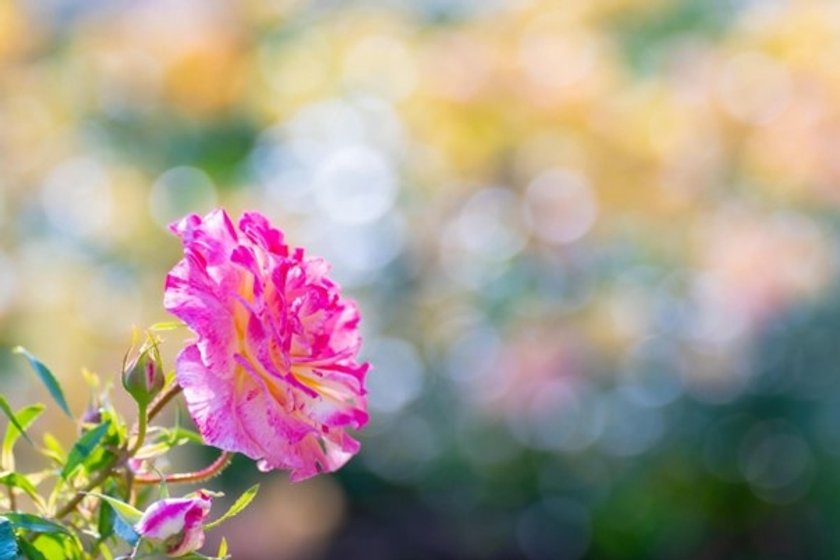
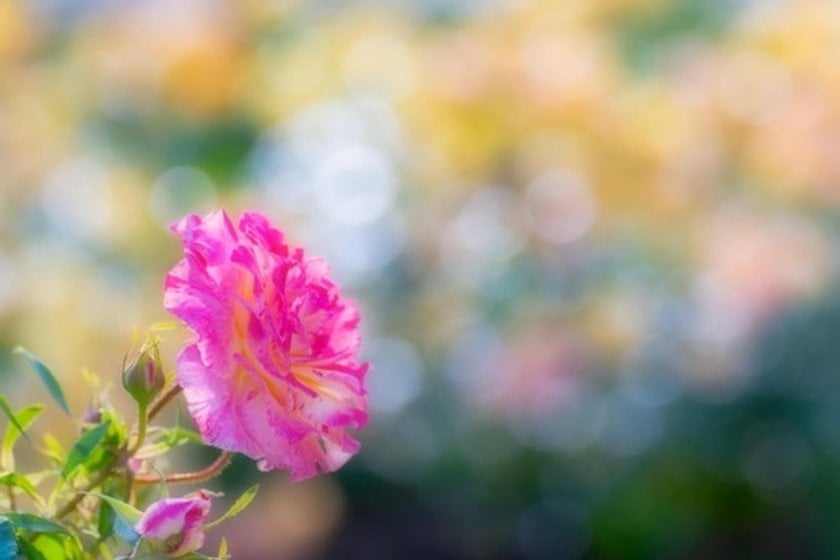
The top photo is uncorrected, and the bottom photo is a photo corrected with the Glow Tool/Soft Orton Effect, Amount 80 and Brightness -100.
The Orton Effect matches the beautiful rose and the round blur in the background, creating a fantastic atmosphere. I hope you've seen that the Orton Effect is perfect for landscape photography and cute and beautiful subjects.
Note that in this correction, I applied the Soft Orton Effect. The Soft Orton Effect produces a soft, blurred effect just like the regular Orton Effect, but it has the advantage of not changing the contrast or saturation much, giving it a natural effect.
If the original photo is brightly coloured and you don't want to increase the saturation or contrast, as in this example, I recommend using the Soft Orton Effect.
Combining the Orton Effect with Other Tools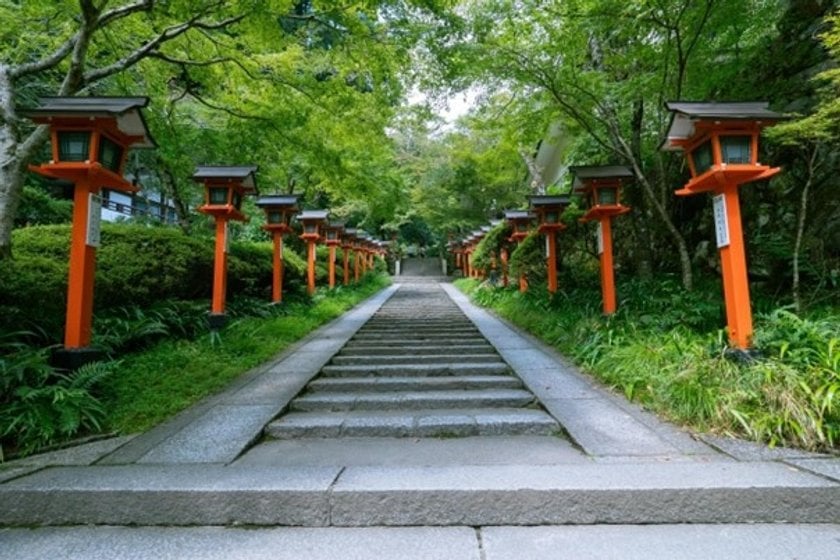
The Orton Effect is highly effective when used alone but even more effective when combined with other tools. I recommend combining it with the Mystical tool. Using the Mystical tool, you can create a glowing effect in bright areas, creating even more fantastical photos.
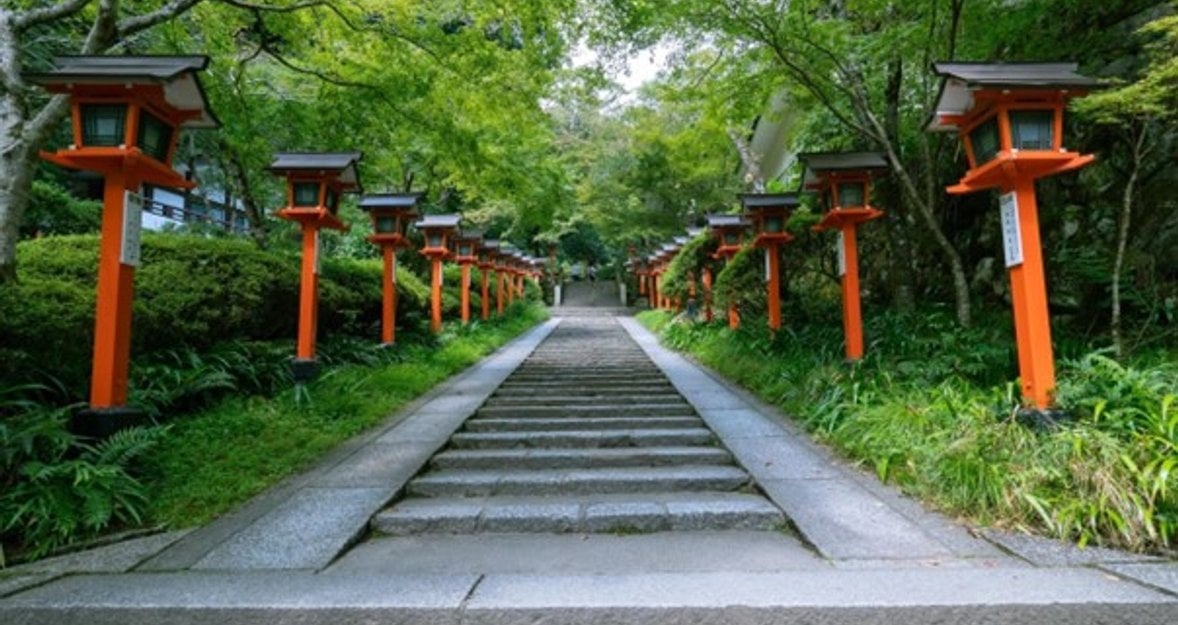
First, I will apply the Orton Effect to a photo taken at Kurama Temple in Kyoto.
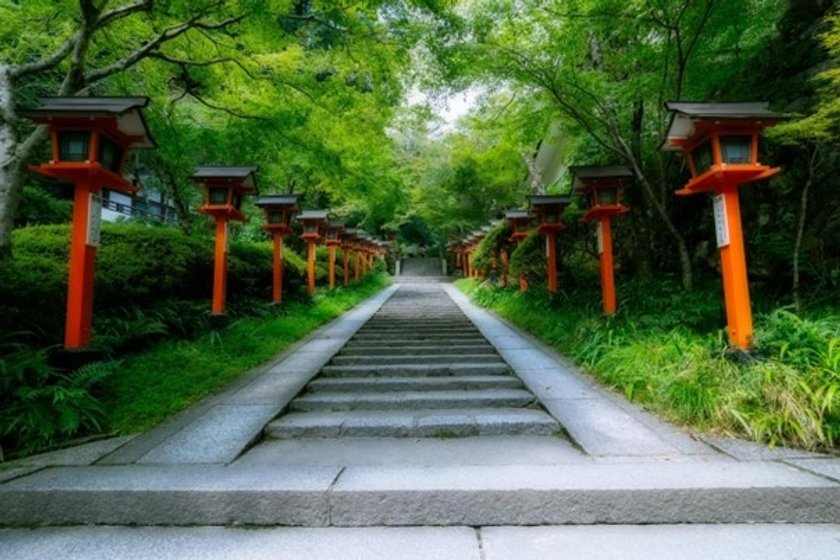
I corrected this photo with Glow Tool/Orton Effect Amount 60 and Brightness -100.
The Orton Effect adds a fantastical feel to the image.
Additionally, I added the Mystical tool and increased the amount to 30.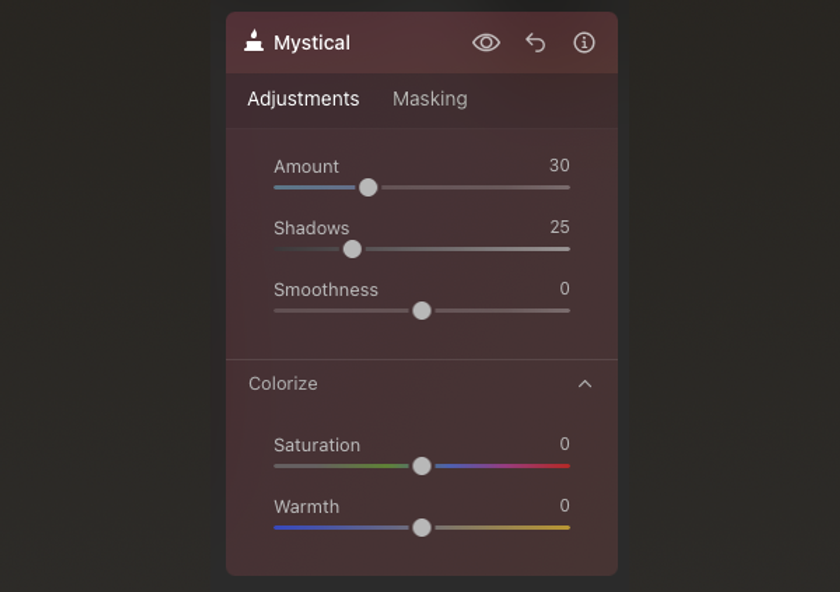
By the way, with the Mystical tool, in addition to the Amount, you can also adjust the Shadows, Smoothness, Saturation, and Warmth.
I corrected this photo with Glow Tool/Orton Effect Amount 60 Brightness -100 + Mystical Tool Amount 30.
The Mistcal tool added shine to the highlights, resulting in a photo with a more atmospheric atmosphere than the Orton Effect alone.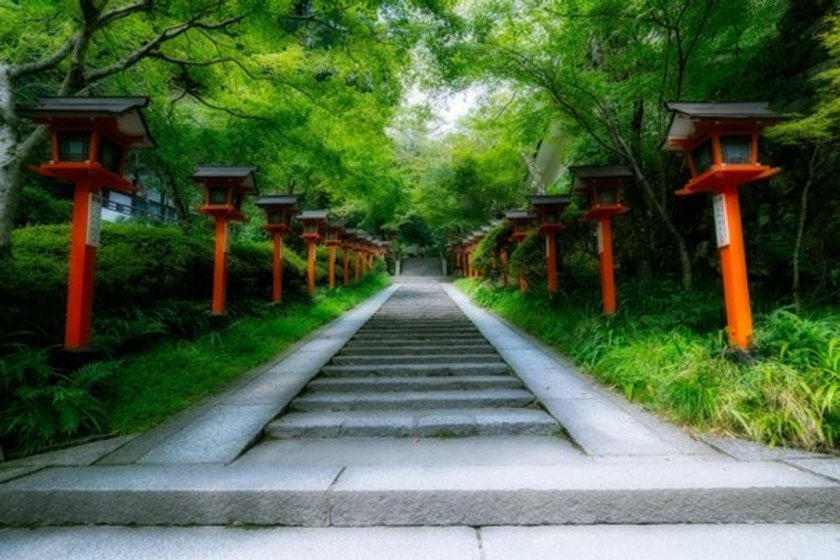
Lastly
As you can see, the Orton Effect is highly versatile and can be used for things other than landscape photography, and many people will fall in love with it as it can easily create a dreamlike atmosphere in their photos.
However, be careful to avoid getting too caught up in its unique atmosphere and make your photo editing all about the Orton Effect.
Now, enjoy photo editing with Luminar Neo using the Orton Effect.

