360 Degree Photography: Guide to Perfecting Panoramas
December 27, 2024

Master 360-degree photography with this complete guide! Learn the essential steps, must-have gear, and post-processing tips to capture immersive and stunning panoramic images.
When Google Street View debuted in 2007, it brought a revolutionary feature: to explore towns and streets visually, like you are there. The question, “How do you take 360-degree pictures?” has piqued everyone's interest. This new method of seeing the world allowed people to peer around from all angles.
Maybe because of this, the “lens life” is so incredible. Photographers are always seeking new ways to capture and share the heart of the moment in a quickly moving digital world.
If you are an amateur, a pro snapper, or just wondering what this kind of photography is, this article will be a complete reference. Through some equipment setup and shooting techniques, then by way of post-processing, we’ll show how to create 360-degree shots, which allows photographers to transport their viewers to the scene.
What Is a 360 Photo
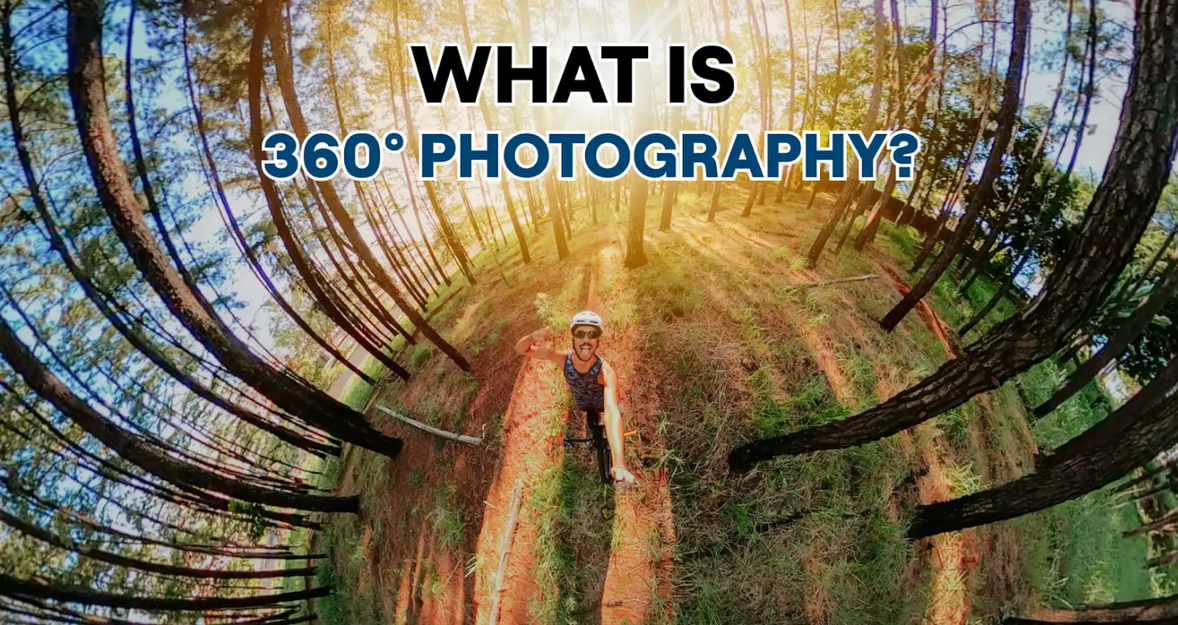
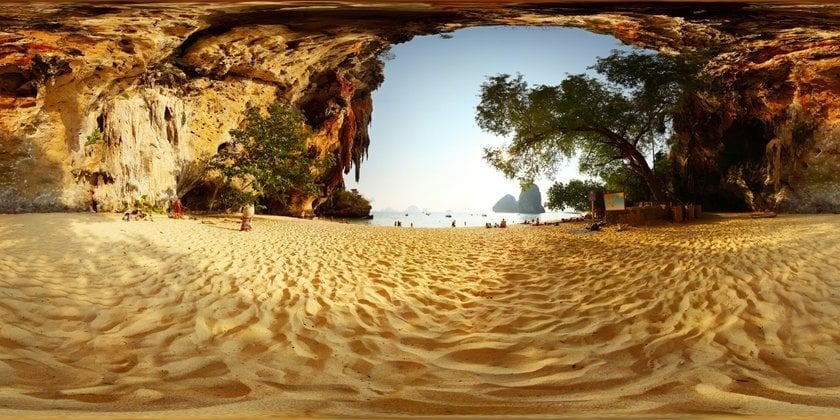
 A 360 photo, or a spherical or panoramic photo, is an image of a location that gives a complete 360-degree perspective from all directions. The panoramic shot definition is simple: viewers can stand in the middle of a picture and experience the surrounding environment by just dragging or tilting in any direction. You may see this kind of shots on social media, real estate sites, or virtual tours.
However, the main question among artists is how to create a 360 photo. Making a 360-degree picture means capturing multiple shots of a location from different angles and mixing them with special software. The good thing about this approach is that it creates a completely smooth and immersive visual experience. In this next set of sections, we’ll cover everything you’ll need for your awesome 360-degree panorama pic.
The Potential and Creative Possibilities of 360 Photography
 360-degree images open up creative possibilities that standard photography doesn’t offer. You can produce immersive photos that take you away from another place and another time, allowing the viewer to see the world from your eyes.
These 360-degree pictures can create interactive virtual tours that allow users to explore parts like real estate property, museums, or tourist destinations at their own pace. They can change the narrative of blogs, social media postings, and multimedia projects and give viewers the feeling of being immersed in situations.
360-camera photography trends in marketing, tourism, gaming, and other fields. It is growing in popularity yearly, making it an interesting topic among photographers.
Bonus: Creative Ideas
 Taking 360 photos means upgrading your work and showing your talent from different perspectives.
With 360-degree photographs, you can make virtual tours of houses, museums, and tourist destinations.
Put your 360 pictures to use in interactive storytelling initiatives.
Play with interesting visual effects like small planet pictures and inverted panoramas.
Choosing the Right Camera and Accessories
Today, there’s all this technology, so you can even do it with a basic smartphone. Fortunately, if you are wondering how to do 360 pictures in an old-fashioned way, we’ve provided these easy instructions.
 Getting a high-quality image of a landscape or bustling city scene can be difficult without the proper equipment, but after reading this guide, you can choose the right camera and accessories for your needs.
Next, consider the basic accessories
Now you know the answer to “What is a 360 photo?”, let's talk about equipment. What should you consider?
Tripods. A tripod helps your camera stay stable and take clear pictures. Opt for a tripod with a leveling base to keep the horizon straight.
Panoramic heads. Shooting with a DSLR or a mirrorless camera, use a panoramic tripod head to rotate the camera smoothly and consistently, capturing all scene angles.
Fisheye lenses. They can capture a wider field of view.
How much you spend on your camera — it's up to you. While 360-degree cameras are more practical, DSLRs and mirrorless cameras offer better image quality and more creative freedom.
Camera Settings and Placement for Best Results
 Consider your camera settings and positioning to get the best from the 360° shots and images. They will significantly influence how your photos look and how good they are overall. In this section, we will walk through the most relevant settings and positioning rules of the camera you should keep in mind.
Camera Settings
To keep the brightness of your photos consistent throughout your series, we recommend using manual exposure. Set a constant white balance to prevent the color from changing, as the automatic white balance does not do the same in every photo. Blot out noise with the lowest possible ISO level, and set your camera's manual focus to an object at the right distance to keep it crisp. At last, operate at a narrower aperture (larger f-number) to increase the depth of field and keep everything in focus.
Camera Placement
For a pro-level 360-degree shot, set your camera at eye level. If you are on the inside, just like the scene looks right, consider the room height and the line of sight. Avoid weird, tilted, or skewed shots to keep your camera level with the horizon. Get it level with a leveling base or built-in level attached to your gear.
Tilt the camera very close to the center of your scene, and you’ll eliminate much of any distortion and stitch a snap. Don’t skimp on stability — a solid tripod is needed (especially if you are taking multiple frames for stitching), and stability is a huge plus for sharp, clean shots.
Once you get these basics nailed, practice different angles and fine-tune your craft in 360 photography.
Shooting Techniques to Capture Comprehensive 360 Views

What is 360 view? It is an image or video that is fully immersive, capturing the whole scene around you and allowing you to look (up/down/around) in any direction as if you were in the scene itself.
To capture a 360° view, careful planning and knowledge about the shooting techniques. Below, we’ll look at the best ways to shoot panoramic photos and how to get these with a fisheye lens.
Panning vs Multi-Shot
To take amazing 360-degree shots, try panning, rotating the camera around one point, and keeping the camera level. This tip is good for wide landscapes or if you use minimal movement (but overlap on your shots more than 30%; otherwise, it will be noisy). If your scene is more complex, use a multi-shot technique, taking multiple photos of the scene from different angles and heights.
Fisheye Lens Usage
When shooting with a fisheye lens, you get a wide field of view, typically between 100° and 180°, letting you capture more of the scene in each shot. The distortion effect gives your images a signature "bulging" look that can add a cool appearance. For clear shots, set your camera to manual focus, locking it on an object at a moderate distance, and use a smaller aperture (higher f-number) to increase the depth of field.
Shooting Tips
The popular question is how to take a 360 photo of an object. We recommend avoiding movement while capturing your 360-degree photo. Also, mind the lighting—it can change quickly, so keep it consistent throughout the shoot to avoid uneven exposure in your final image.
Lastly, plan your shots ahead of time. Mapping out your route and angles lets you cover every part of the scene, leaving no gaps in your 360-degree image and keeping everything smooth when stitching.
Post-Processing, Sharing, and Creative Ideas
Once you have a fresh material, you can stitch, improve, and share. Let’s see how to get through this with the software Luminar Neo.
Step 1: Stitching Images into a 360-degree Panorama
Use Luminar Neo's Panorama Stitching feature or third-party software to stitch 360-degree images. Manually align and blend your pictures to ensure a seamless 360-degree panorama.
Step 2: Editing Your 360 Photos with Luminar Neo
Wrap your photos in color settings like white balance, contrast, and saturation. Remove unwanted objects out of retouched images or fix imperfections. Utilize Luminar Neo’s AI tools to use smarter tools to correct details and lighting in your photos. If you shoot with a fisheye lens, use the Custom Effects Roll and apply the Optic tool to remove vignetting (dark corners) or eliminate lens distortion.
Step 3: Sharing Your Photos on VR Platforms
Share your 360 photos on platforms that support interactive viewing (Facebook, Youtube, VRpler, Kuula, VRchive, or various platforms). Reduce the sizes of your images without sacrificing quality. Add interactive elements like hotspots or annotations to enrich the viewer's experience.
Final Thoughts
 You can showcase the world through 360 photography. You can produce tremendous 360-degree panoramas with proper equipment and comprehending shooting techniques. Grab your camera and enjoy it!


