Making the most of Noiseless AI
September 09, 2022

Noiseless AI is the latest extension added to the Luminar NEO family. Let’s take a look at how to use it in your workflow to make the most of this new technology.
What is digital noise?
Noise appears as artefacts in our image where pixels take on a color or brightness value that does not represent the captured scene. When viewed over a whole picture, it appears as a random distribution of speckled pixels that degrades the quality of our photo. Similar in appearance to grain captured on traditional film.
We often benefit from raising our ISO when we shoot in darker environments. But as a consequence, the more sensitive we make our camera’s sensor, the higher the amount of digital noise captured in the file. That happens because, behind the scenes in the camera, we amplify the electronic signal in our sensor, which boosts the noise artefacts.
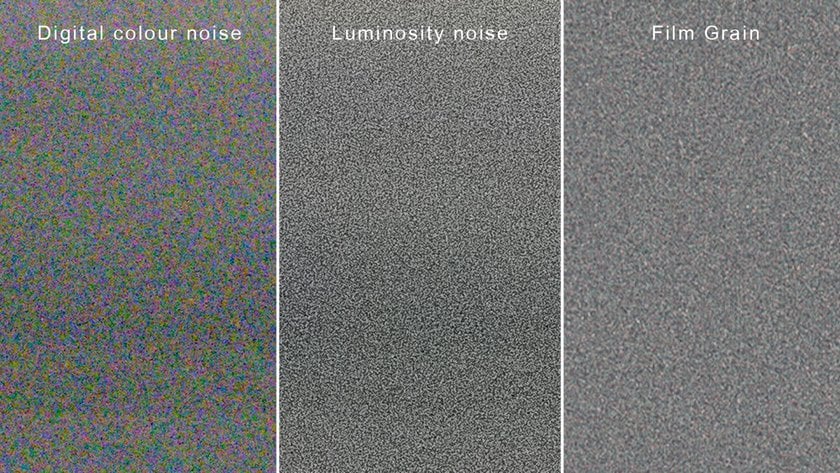 In the image above, the first two panels show examples of the digital noise presenting higher ISO images. The third demonstrates their close visual cousin, traditional film grain effect.
In most instances, noise is an unwanted artefact that photographers want to minimize. Until now, the traditional online noise reduction tools are where we would turn to solve the issue. But with the release of NoiselessRaw, we now have a more powerful tool at our disposal.
A comparison between the Noise Reduction tool and NoiselessRAW
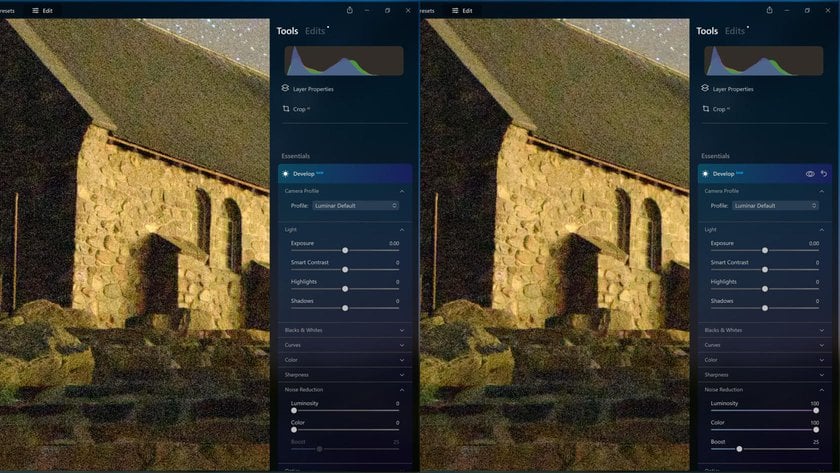 The example above shows the original raw file on the left with some heavy noise artefacts. On the right-hand side is the same photo segment with the traditional Noise Reduction tool applied with both the Luminosity and Color sliders cranked up to the maximum. The result is an improvement but by no means significant — step in NoiselessRAW.
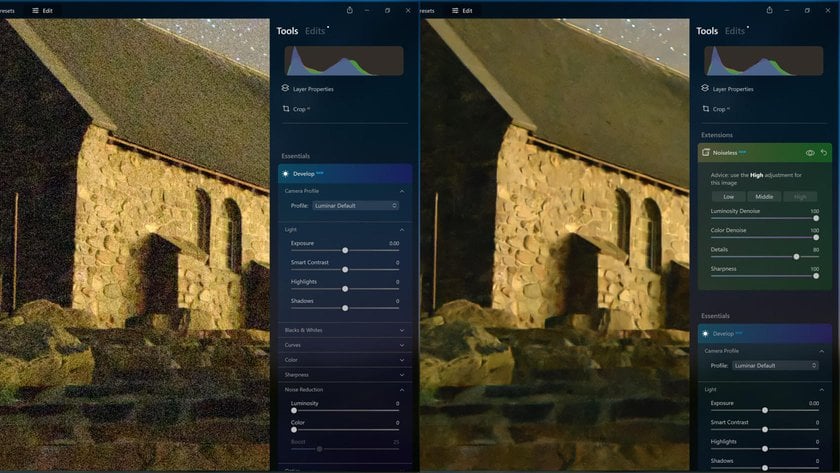 While I wouldn’t recommend pushing the settings as high as this in a practical edit, by aggressively applying the sliders, we can see that both luminosity and color noise have been effectively eradicated. In contrast, the form of objects has been enhanced. The stone edges are sharp, and the stars are points of light once more.
Understanding the difference between NoiselessRAW vs. NoiselessAI
Depending on when in the edit you apply it, the Noiseless tool will determine whether it is acting upon the raw file or not. Suppose you want to benefit most from the instrument. In that case, you’ll want to apply Noiseless on a raw photo at the beginning of the edit. This will ensure maximum quality from the tool because the more data we can give Luminar for our edits, the more accurate our final result is.
You will know the difference because the tool title will change depending on where you are in the editing process. Noiseless will be appended with the text “RAW” to let you know it’s working on the raw file. Once you’ve moved beyond the raw edit during your processing, the tool is now titled NoiselessAI. If you forget to apply NoiselessRAW at the beginning, you can always return to the instrument via the Edits tab. It will be available at the bottom of the stack next to the developRAW tool (providing you’re using a raw photo rather than a jpeg).
Notice in the edit stack above, NoiselessRAW remains at the bottom of the edit stack along with DevelopRAW. NoiselessAI has been added as another step in the editing process. It appears in the stack at the point it was applied. In this case, the last step.
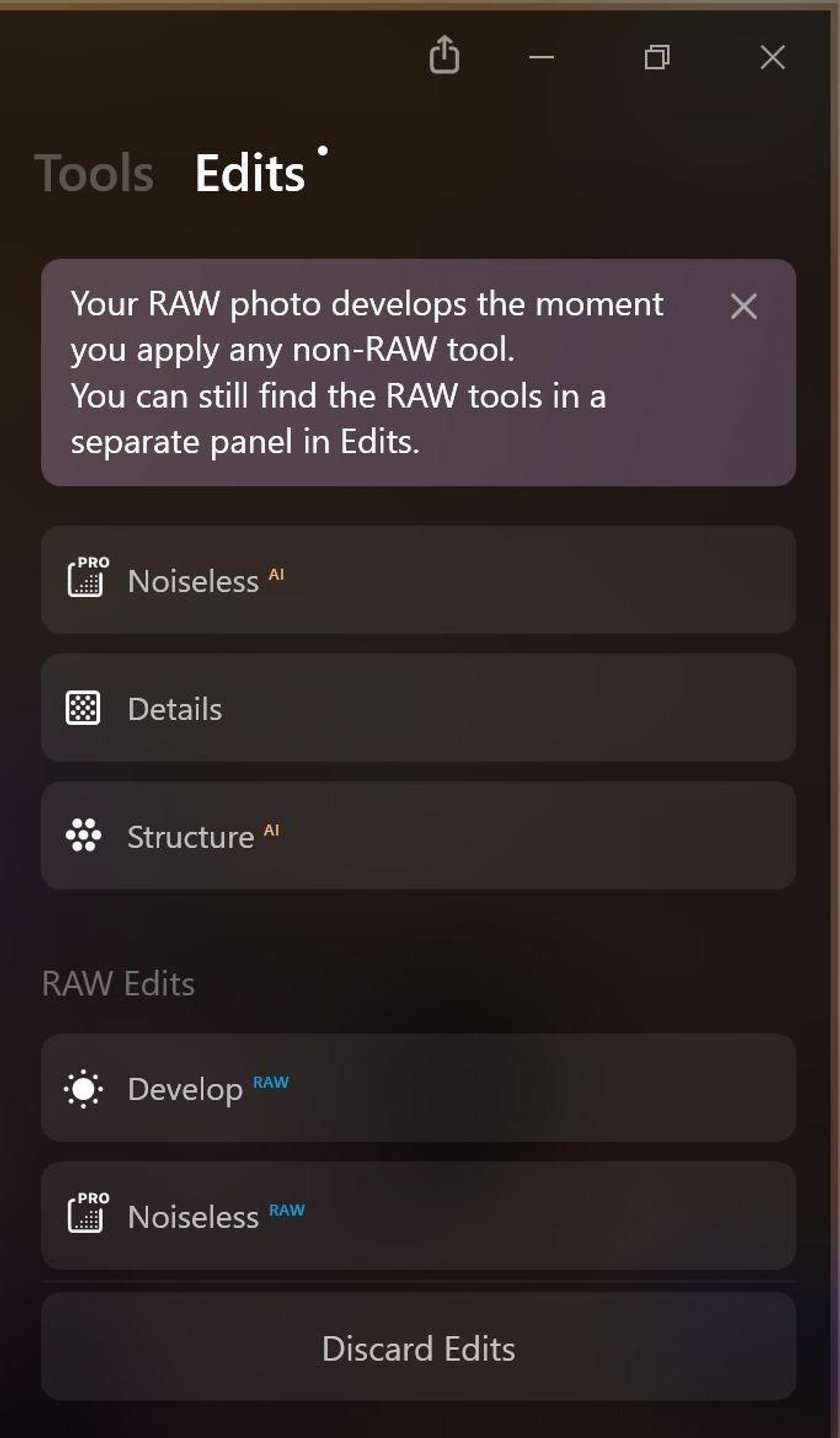
How to use NoiselessRAW
The noiselessRAW extension is accessible in the Tools tab of Luminar Neo and via the Edits Tab. As with so many of Luminar’s tools, using Noiseless is EASY.
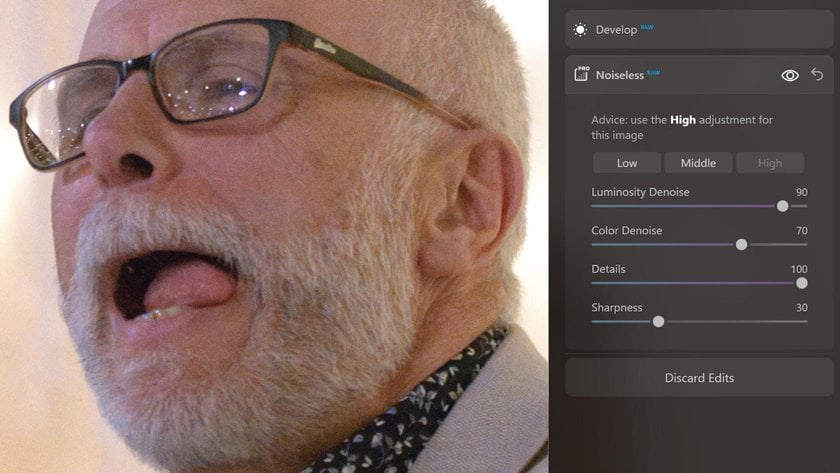
When you open the tool by clicking on the NoiselessRAW title, artificial intelligence will recommend the noise reduction level that should be applied. You can opt for low, medium, or high. To better understand the look and feel of the noiseless algorithm, I recommend playing around with each option to see the result and see what you like.
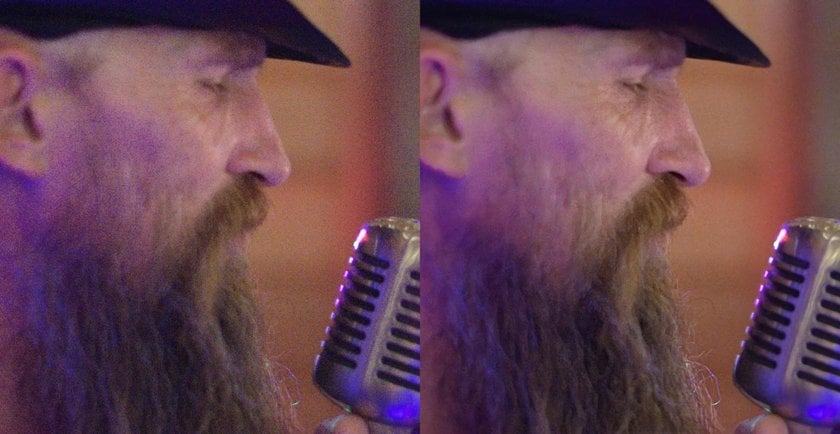
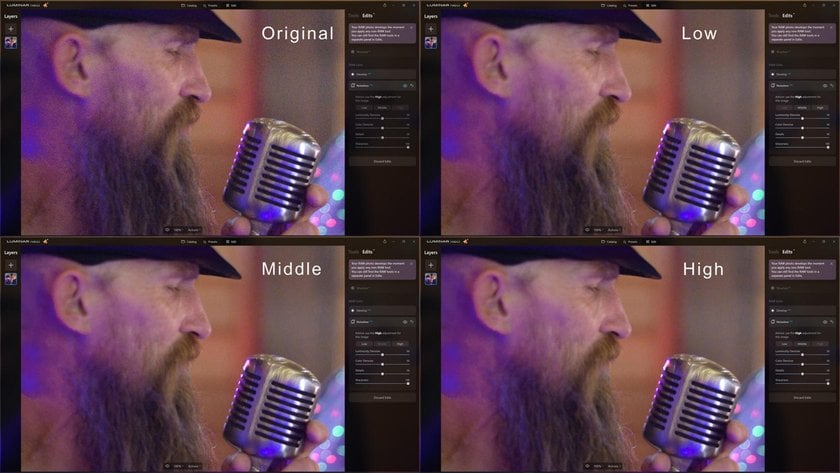 The example above shows a different look as the noiseless extension is applied to the original raw photo with the three differing strengths. The side-by-side comparison below shows the original and the noiselessRAW used with high strength and moderate sharpening. (The original photo was taken in meager light with a shallow f1.4 lens at ISO 6400, so the picture itself suffers from a lack of sharpness. The image has been zoomed in to 100% to show the noise fully).
The Luminosity Denoise Slider
This slider has a default of 50 and controls the variability of those rogue pixel brightness variations. Set this to a point where you feel the mottled speckling is under control but be careful not to take it too high just for the sake of it. Your photos can be more plastic-looking if this slider is pushed too far. Try to use the minimum amount you can get away with.
The Color Denoise Slider
The default of 50 on this slider tends to do the trick. It will help minimize those nasty color variations that shooting at high ISO can cause. Unlike the Luminosity Denoise slider, pushing it more aggressively doesn’t have as many drawbacks. Usually, though, a small amount of this goes a long way.
Explore the Future of Noise Reduction with NoiselessAI
Try It in Luminar NeoThe Details Slider
This slider helps to bring back the original details of the photo, thus counteracting the potential smoothness that the Luminosity Denoise slider may introduce. To get the effect you’re after, you want to flip-flop between adjusting this slider and the luminosity slider until you have the look you envisioned.
The Sharpness Slider
This slider helps to maintain sharpness in the edges of your photo. Be mindful that adding too much sharpness can start reintroducing noise elements, so use this slider carefully to achieve a nice balance. I prefer to keep this to a minimum and then use the dedicated sharpening tools in Luminar Neo and a mask to finesse the sharpening.
Examples In action
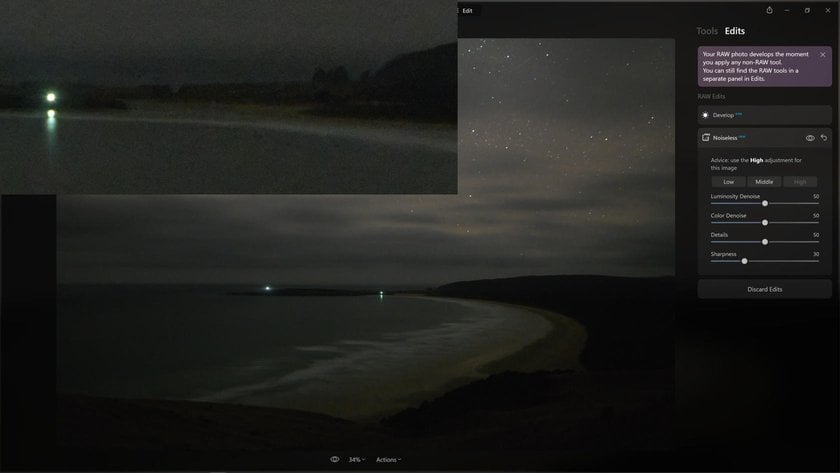
Below is a comparison of a handheld night shot captured at ISO 12800. The original was fit for the bin and unsalvageable with traditional Denoise tools. After applying NoiselessRAW, I was happy enough with the result to deem the shot a “useable” file.
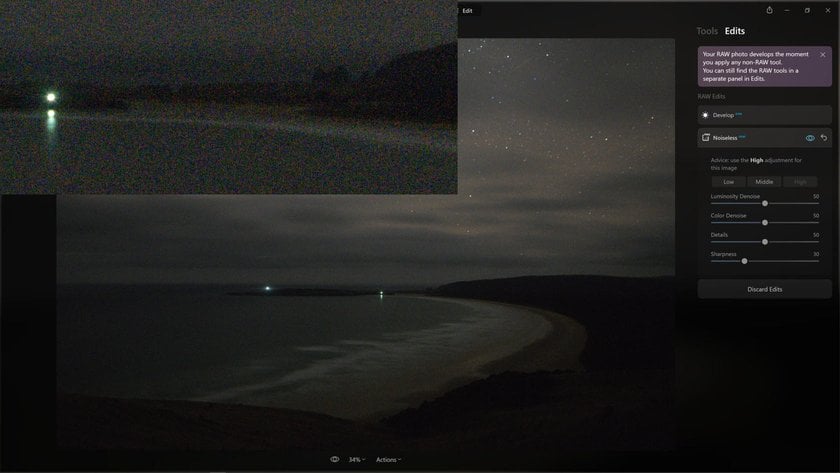 Above: Original ISO12800 shot of Surat Bay, NZ.
Below: After NoiselessRAW in High mode and default slider settings.
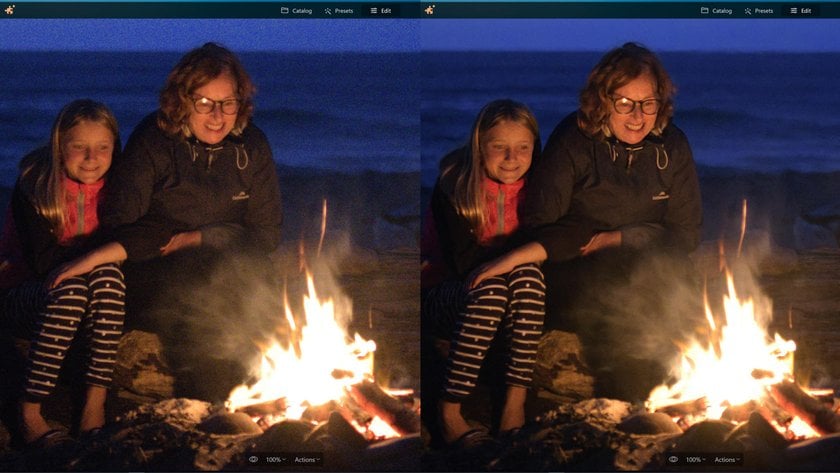
 In the following example, I leveraged more of the Details slider and the Sharpness Slider to bring detail back into the faces of my daughter and mother-in-law. Again the photo went from a shot teetering on the brink of finding its way into the bin due to the amount of noise to one I’d be happy to print.
 The examples in the article all show zoomed-in portions of the overall photos. Below is an even tighter zoom. Any minor anomalies are not noticeable when viewed at “fit to screen.”

 Wedding receptions are notorious for low light; high ISO photography is often the only answer. Thankfully as you can see from the full zoom showing before and after, noiselessRAW was able to give me a much cleaner file to edit.
Below: Original without NoiselessRAW applied.
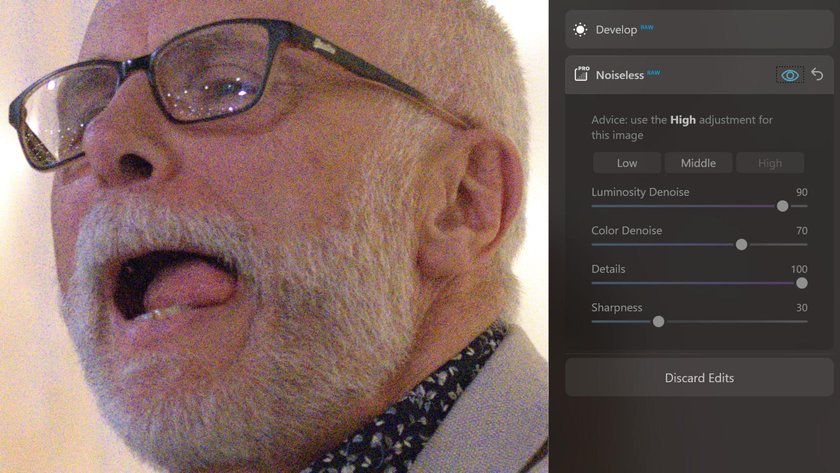 Below: After NoiselessRAW is set to high.
 NoiselessRAW will be a valuable addition to your editing arsenal if you photograph in low light. You can get by with the Noise Reduction tools in Neo to reduce minimal noise. Still, as soon as those artefacts get too much, NoiselessRAW will be your savior!
NOTE: All photos in this article were not processed in any way other than adding the NoiselessRAW or NoiselessAI tool. Images © Anthony Turnham
Subscribe now for a special offer price and get all current and future Extensions.


